In this tutorial, we provide instructions how to set up a personal deep learning environment on the Google Cloud Platform (GCP), and how to create and run a (computing) instance on a virtual machine (VM) which (re)uses an instructor-designed image. Please follow the steps in detail.
Important note: this setup is part of Assignment 0.
Contents
- Step 1: Log into Google cloud account
- Step 2: Create your project and GCE instance
- Step 3: Connect to your instance
- Step 4: Check the tools
- Step 5: Jupyter Notebook
- *Step 6: Other useful tools in GCP
Step 1: Log into Google Cloud Account
-
Go to the Google cloud console (https://cloud.google.com/) and sign in with your LionMail account (yourUNI@columbia.edu).
If you sign up with some other account, you will not be able to use google coupons provided by instructors.
-
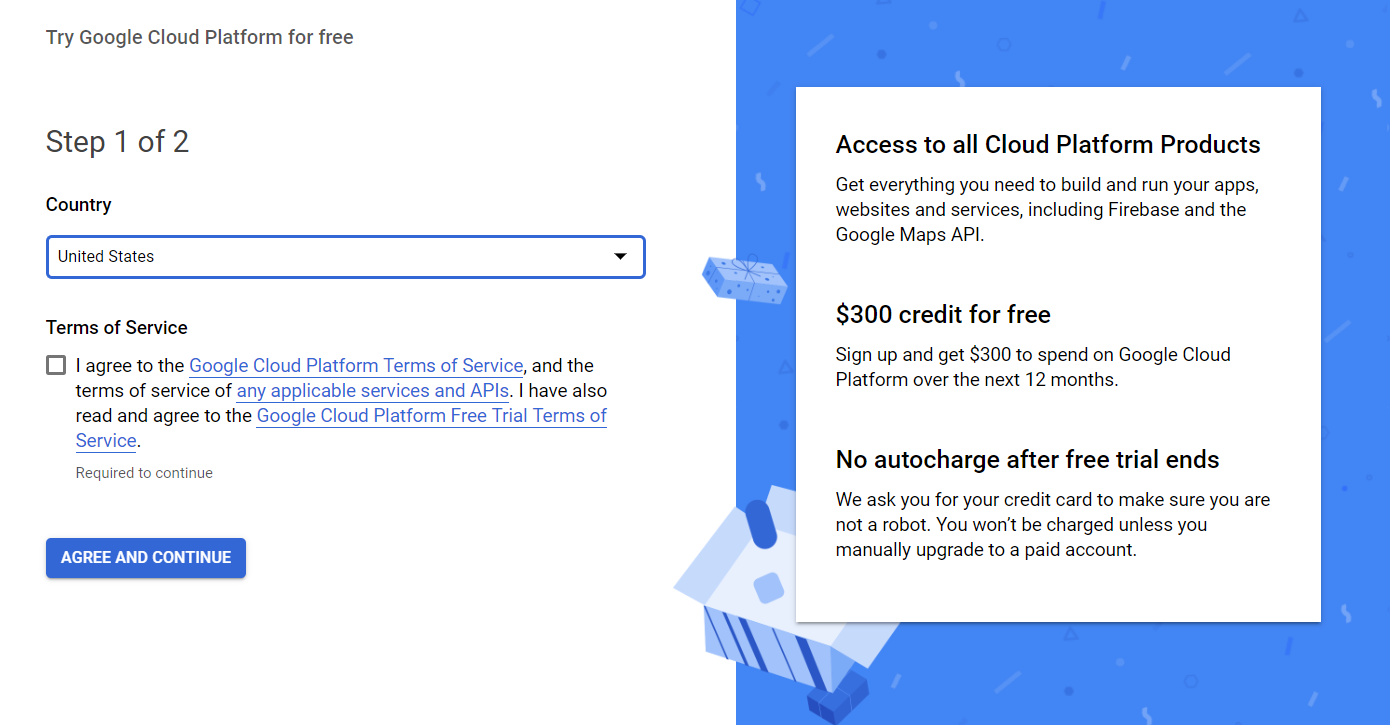
If you are a new user of Google cloud, you can get $300 credits for free by clicking 'Get started for free'. You can explore the GCP for a while with free credits. After the add/drop period, students will get educational coupons from instructors to cover course-related google cloud expenses.
-
Redeem your educational google cloud coupons (Google cloud coupon distribution method TBD). Charges for using a GPU can be approximately $1/hour - so please manage your computational resources wisely. A good way to do this is to create a deep learning environment on your local computer and debug your code there, and only finally run it in the Google Cloud when more powerful computational resources are needed. Note that some assignments can be executed even on non-GPU personal computers.
If you have received a coupon/code, go to https://console.cloud.google.com/education, select your LionMail account on the top right, and redeem the coupon.
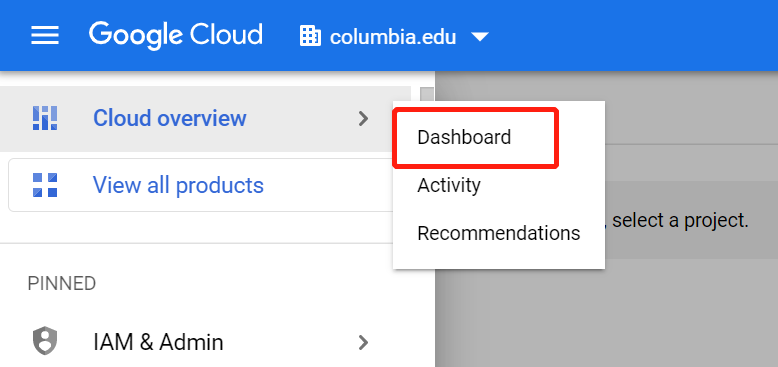
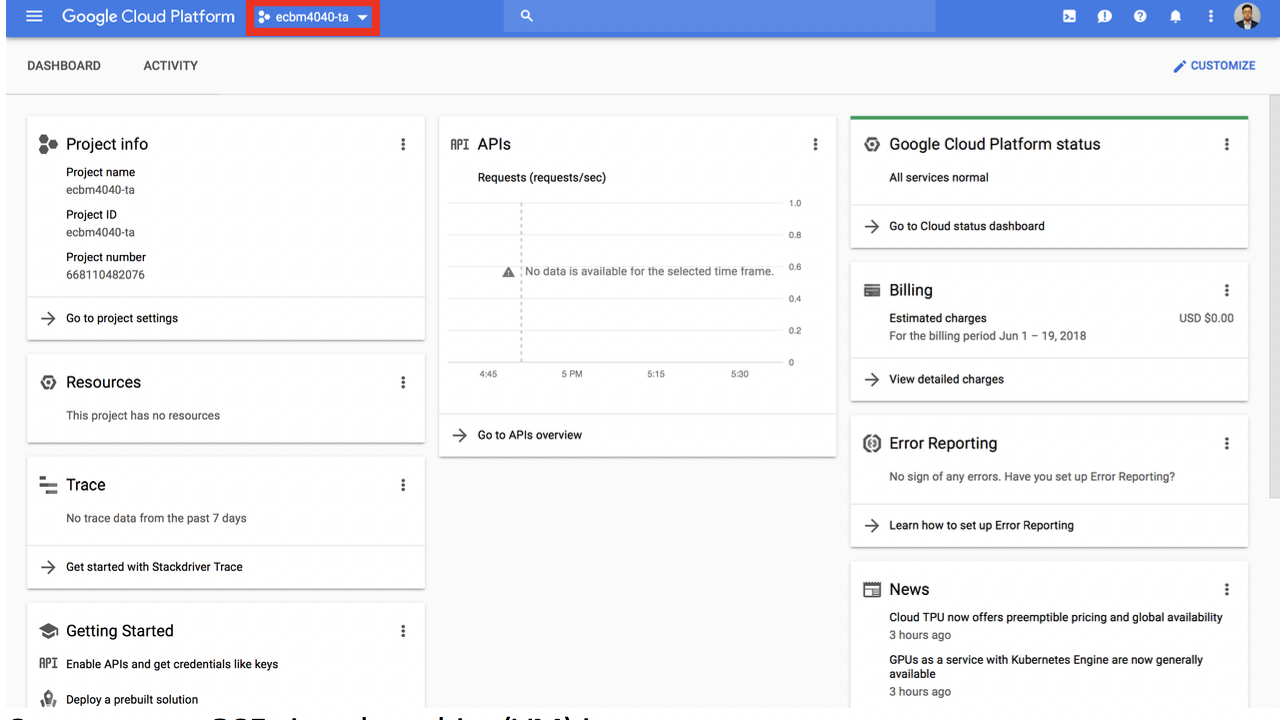
Now, you can visit your Google cloud dashboard.
Step 2: Create your project and Google Compute Engine (GCE) instance
-
Go to Google cloud dashboard
-
Create your project
Click 'create project'
For administrative reasons, we request that you use 'ecbm4040-yourUNI' as your project name.
If you have already received coupon from TAs, please choose the course billing account which is automatically created when you redeem the coupon (This is important to for Google to get requests approved smoothly).
After a few seconds, you should be able to see the homepage of your newly created project.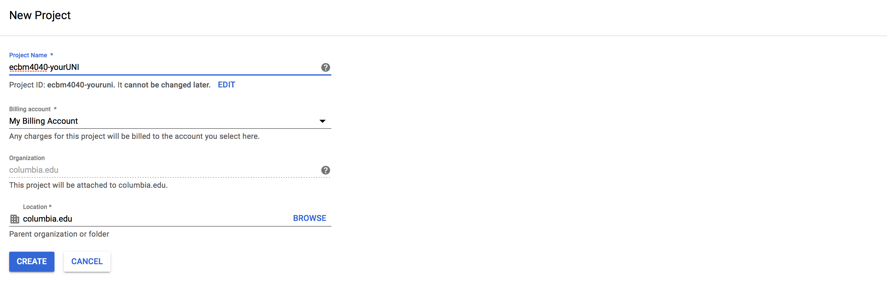
-
Upgrade your billing account (skip if already upgraded)
If this is your first time using GCP with your columbia ID, you need to upgrade your account to get access to all GCP features. Click 'Navigation Menu' on the top-left of homepage.
Go to 'Billing' -> 'Overview'. Click 'UPGRADE' option in "Free trail credit" section.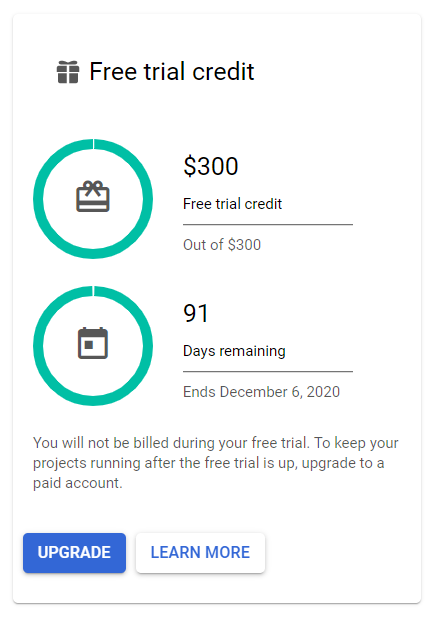
-
Verify your GPU quota(s)
Make sure to select the project that you just created 'ecbm4040-yourUNI'.
- Make sure you have upgraded your account and enable the billing account for your project.
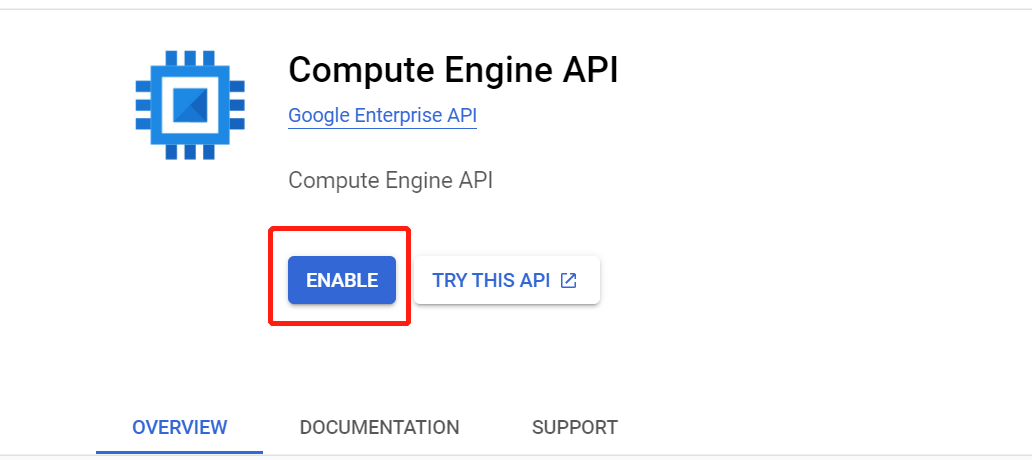
- Go to ‘Compute Engine’ -> ‘VM instances’ and enable the API.
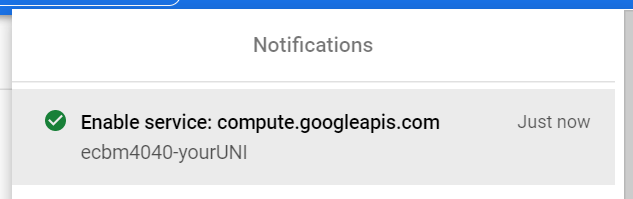
- If Compute Engine API has been set up, you should be able to see that in your notification.
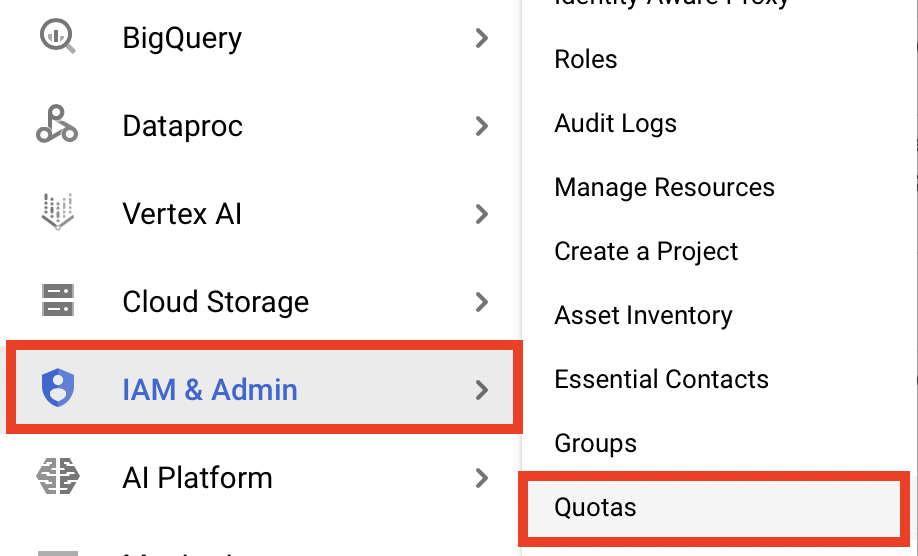
- Go to the ‘IAM & Admin’ -> ‘Quotas’
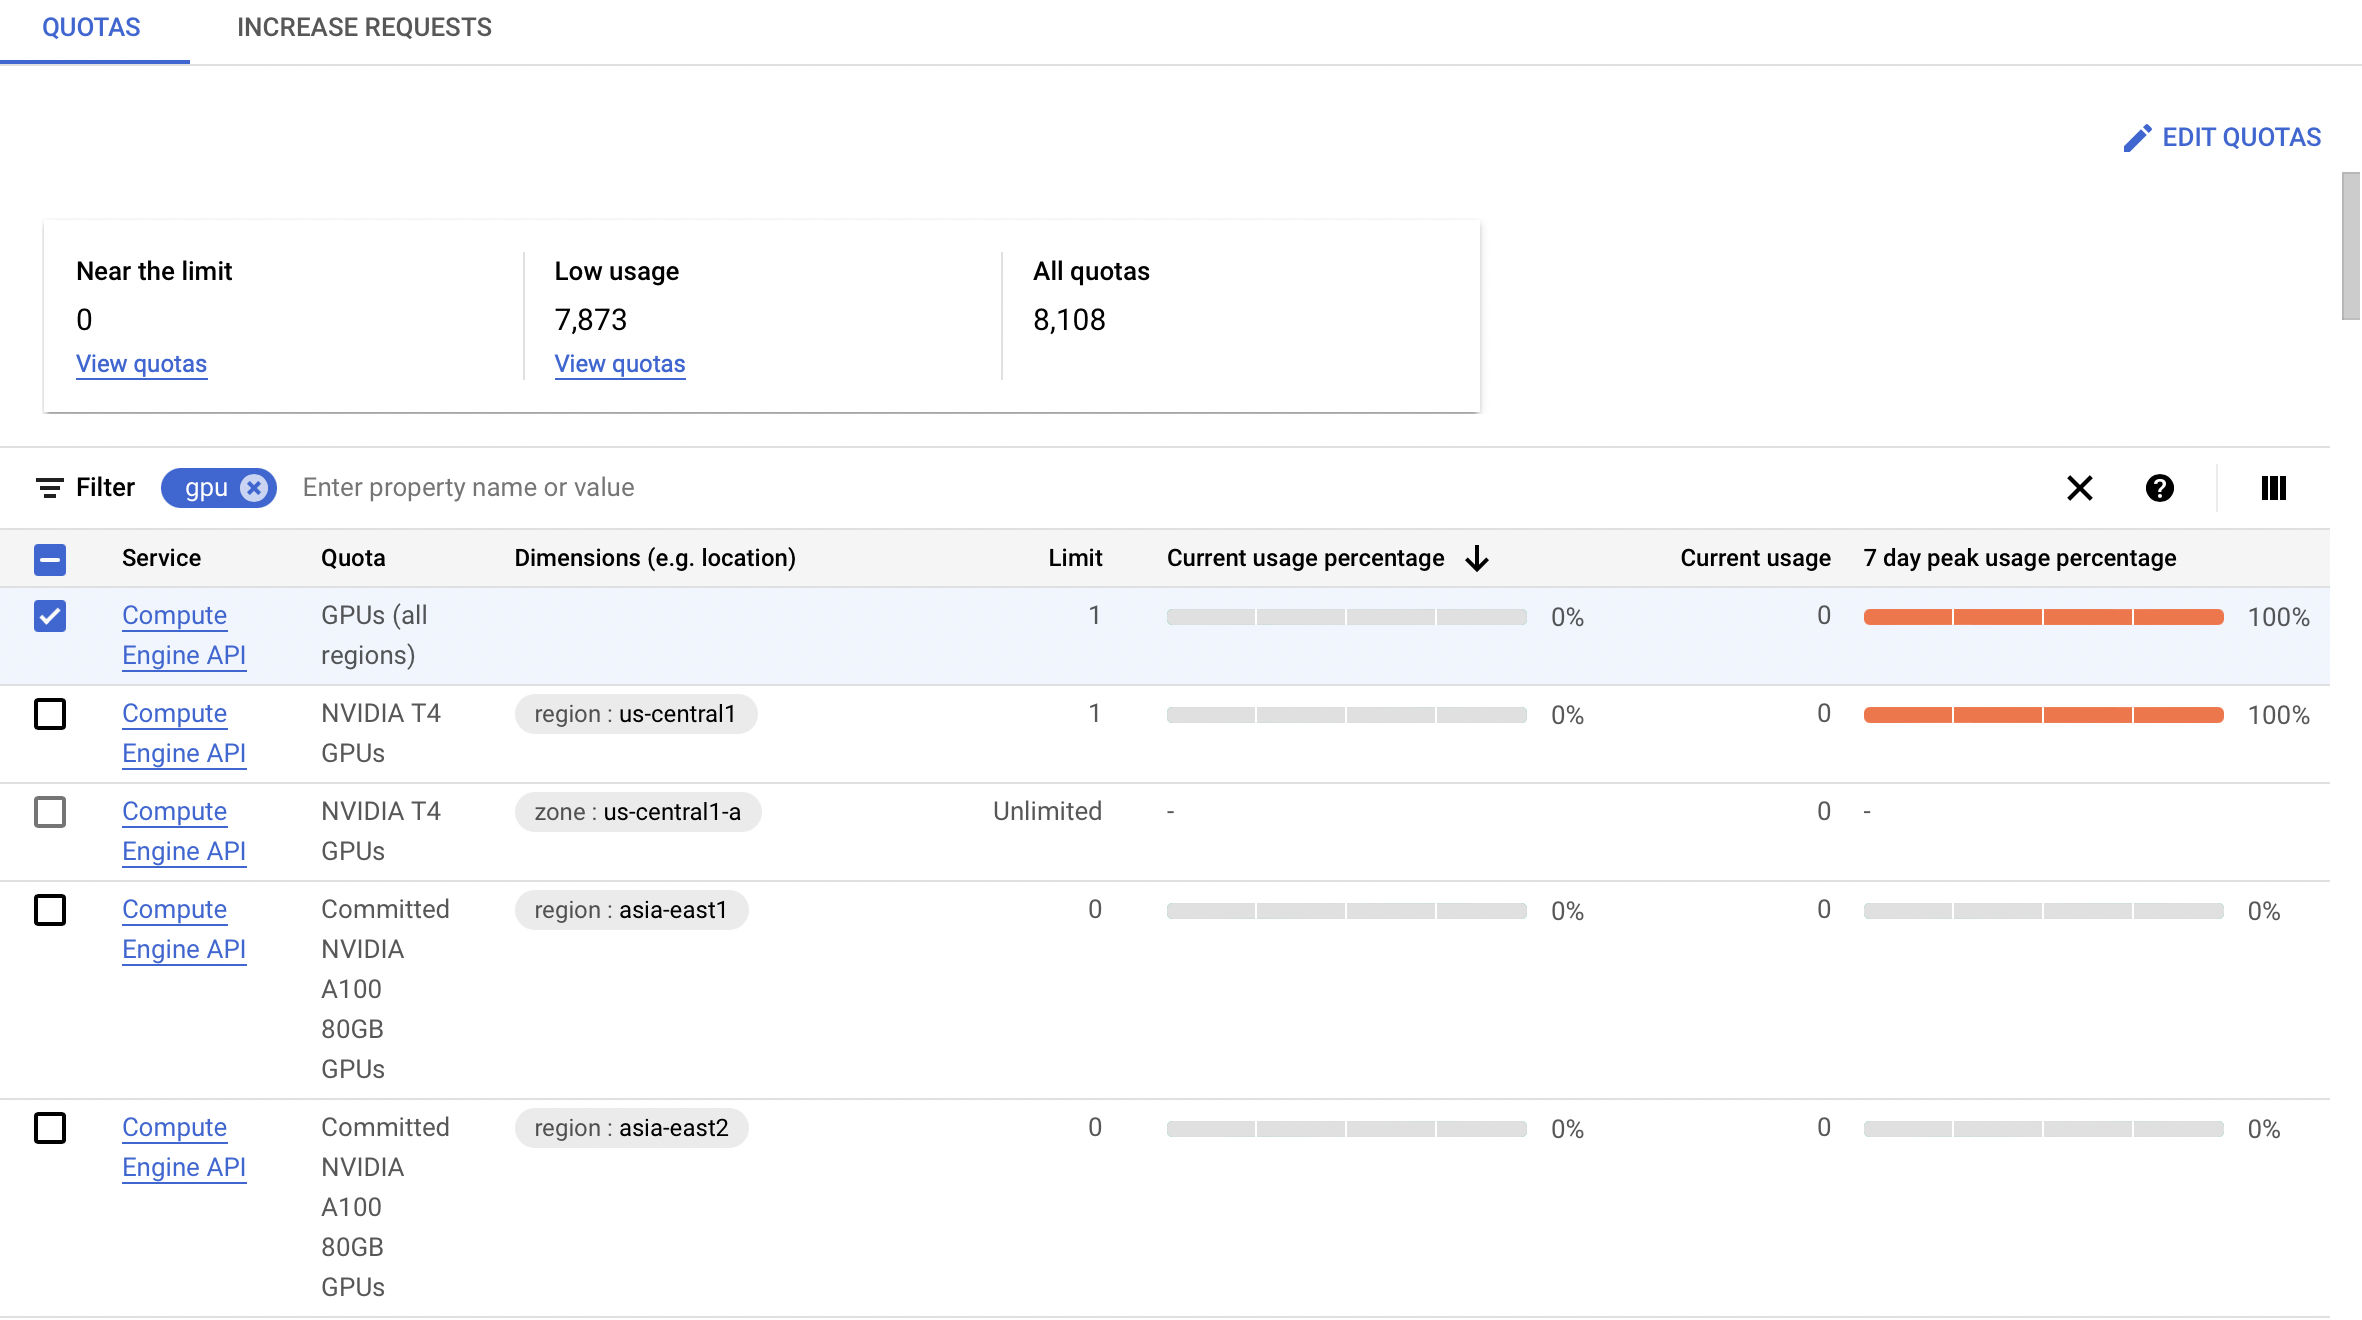
- Type "gpu" in the filter as shown below. Find "GPUs (all regions)".
-
Check if the limit is at least 1.
This needs to be done ONLY for GPUs (all regions), which is checked with the blue checkmark.
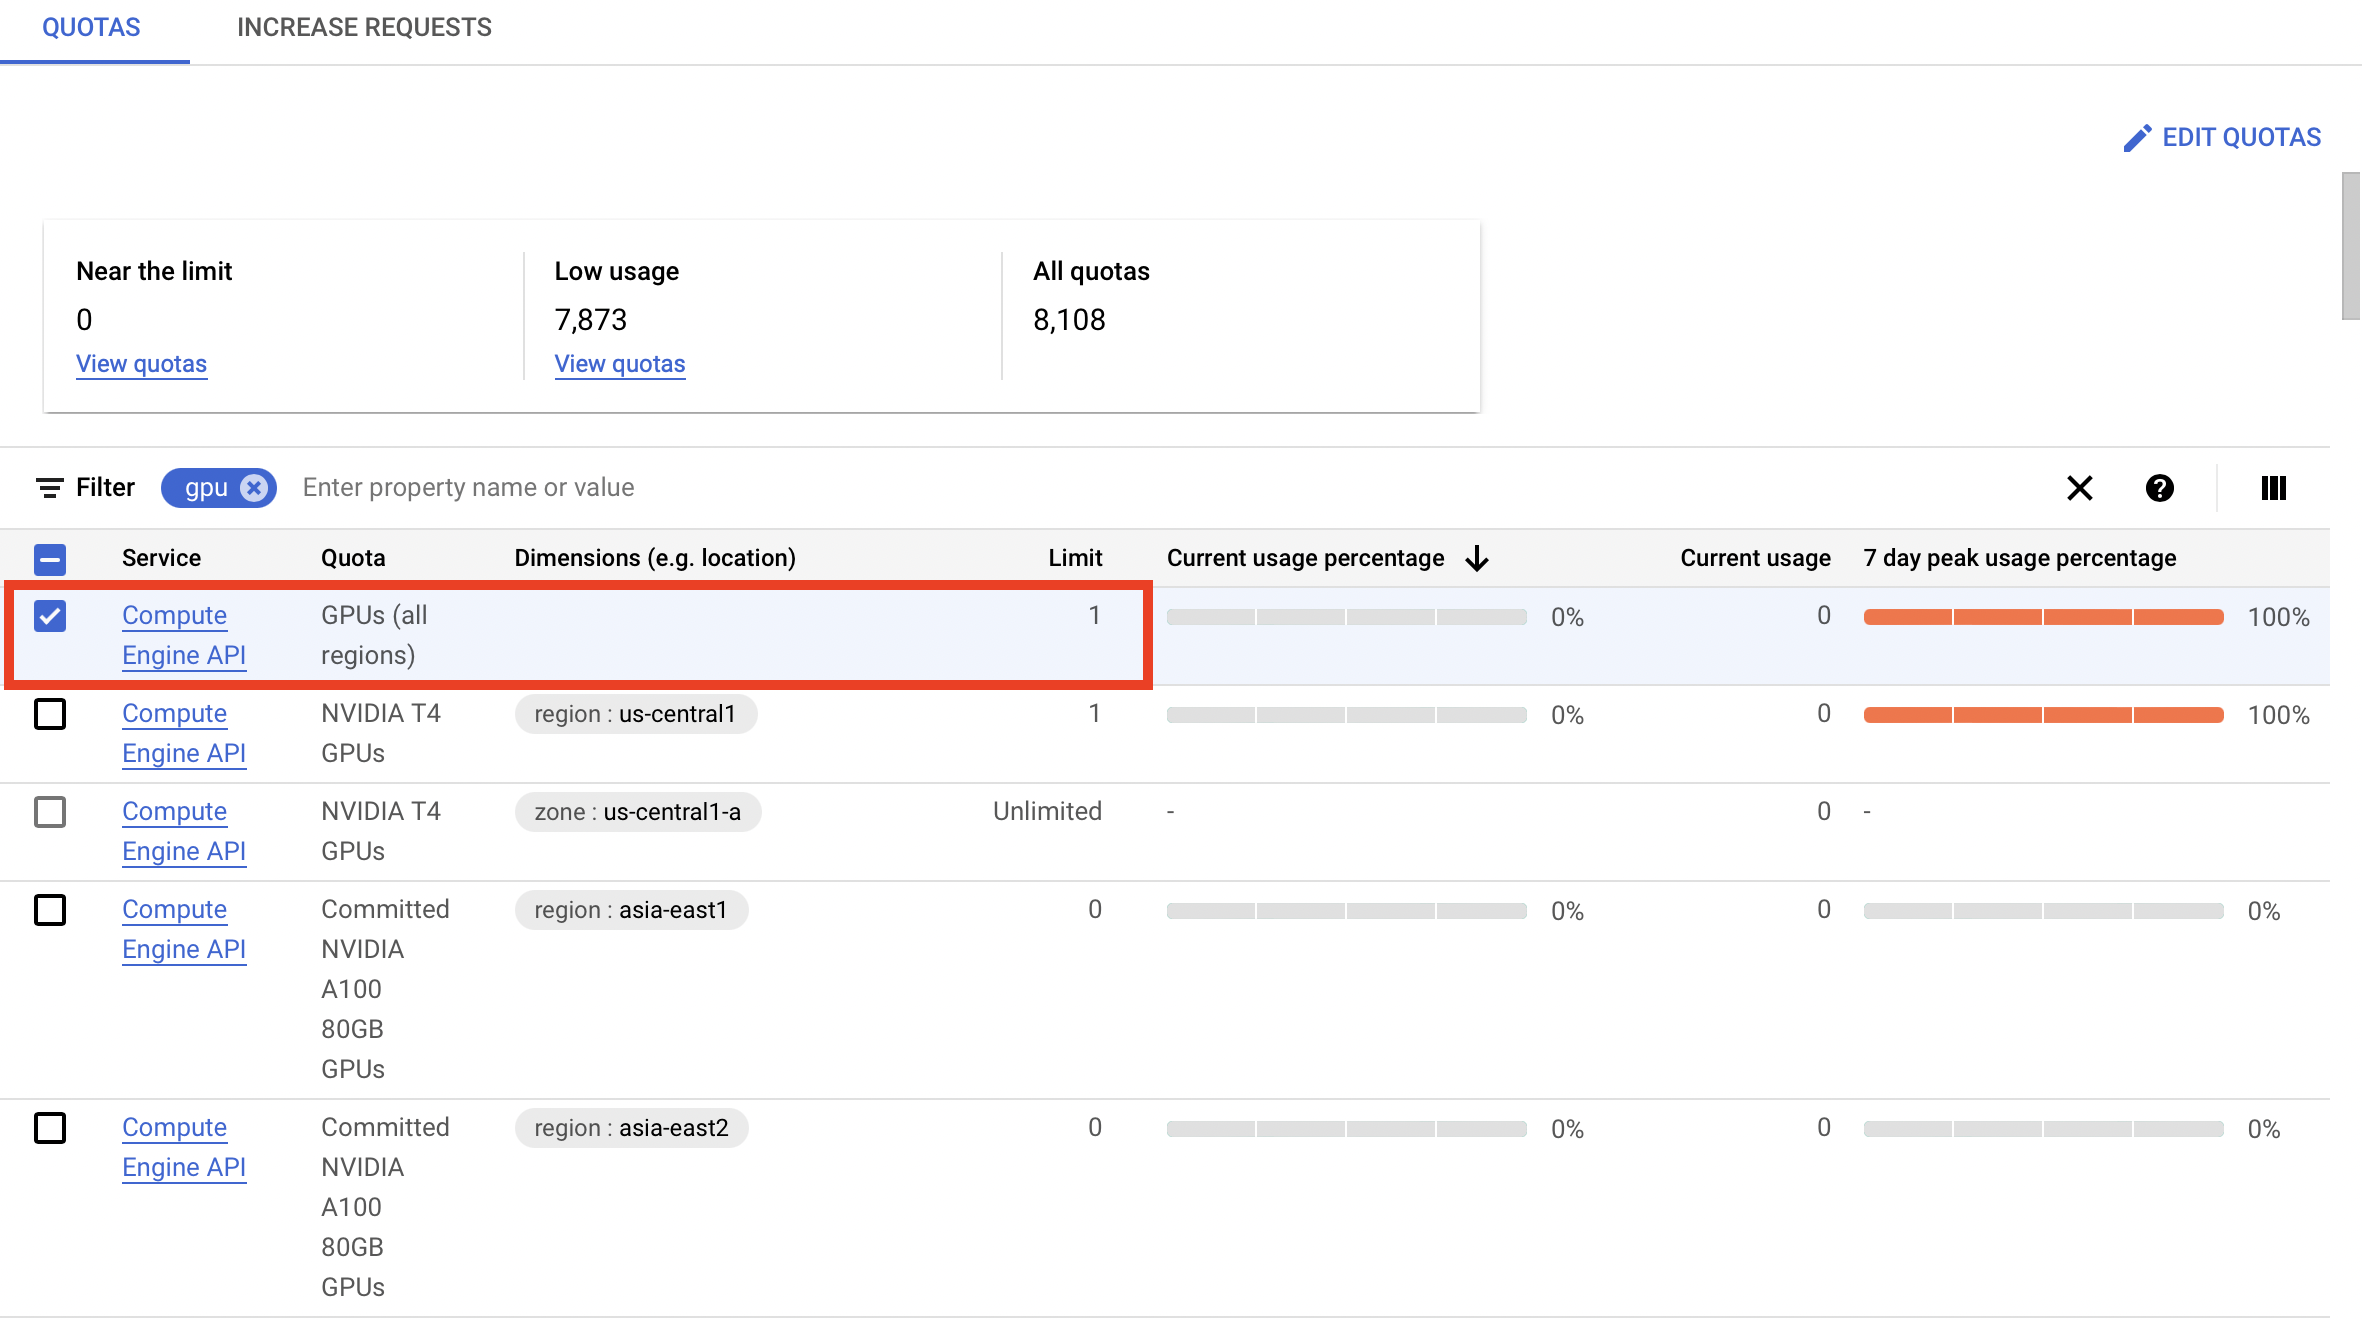
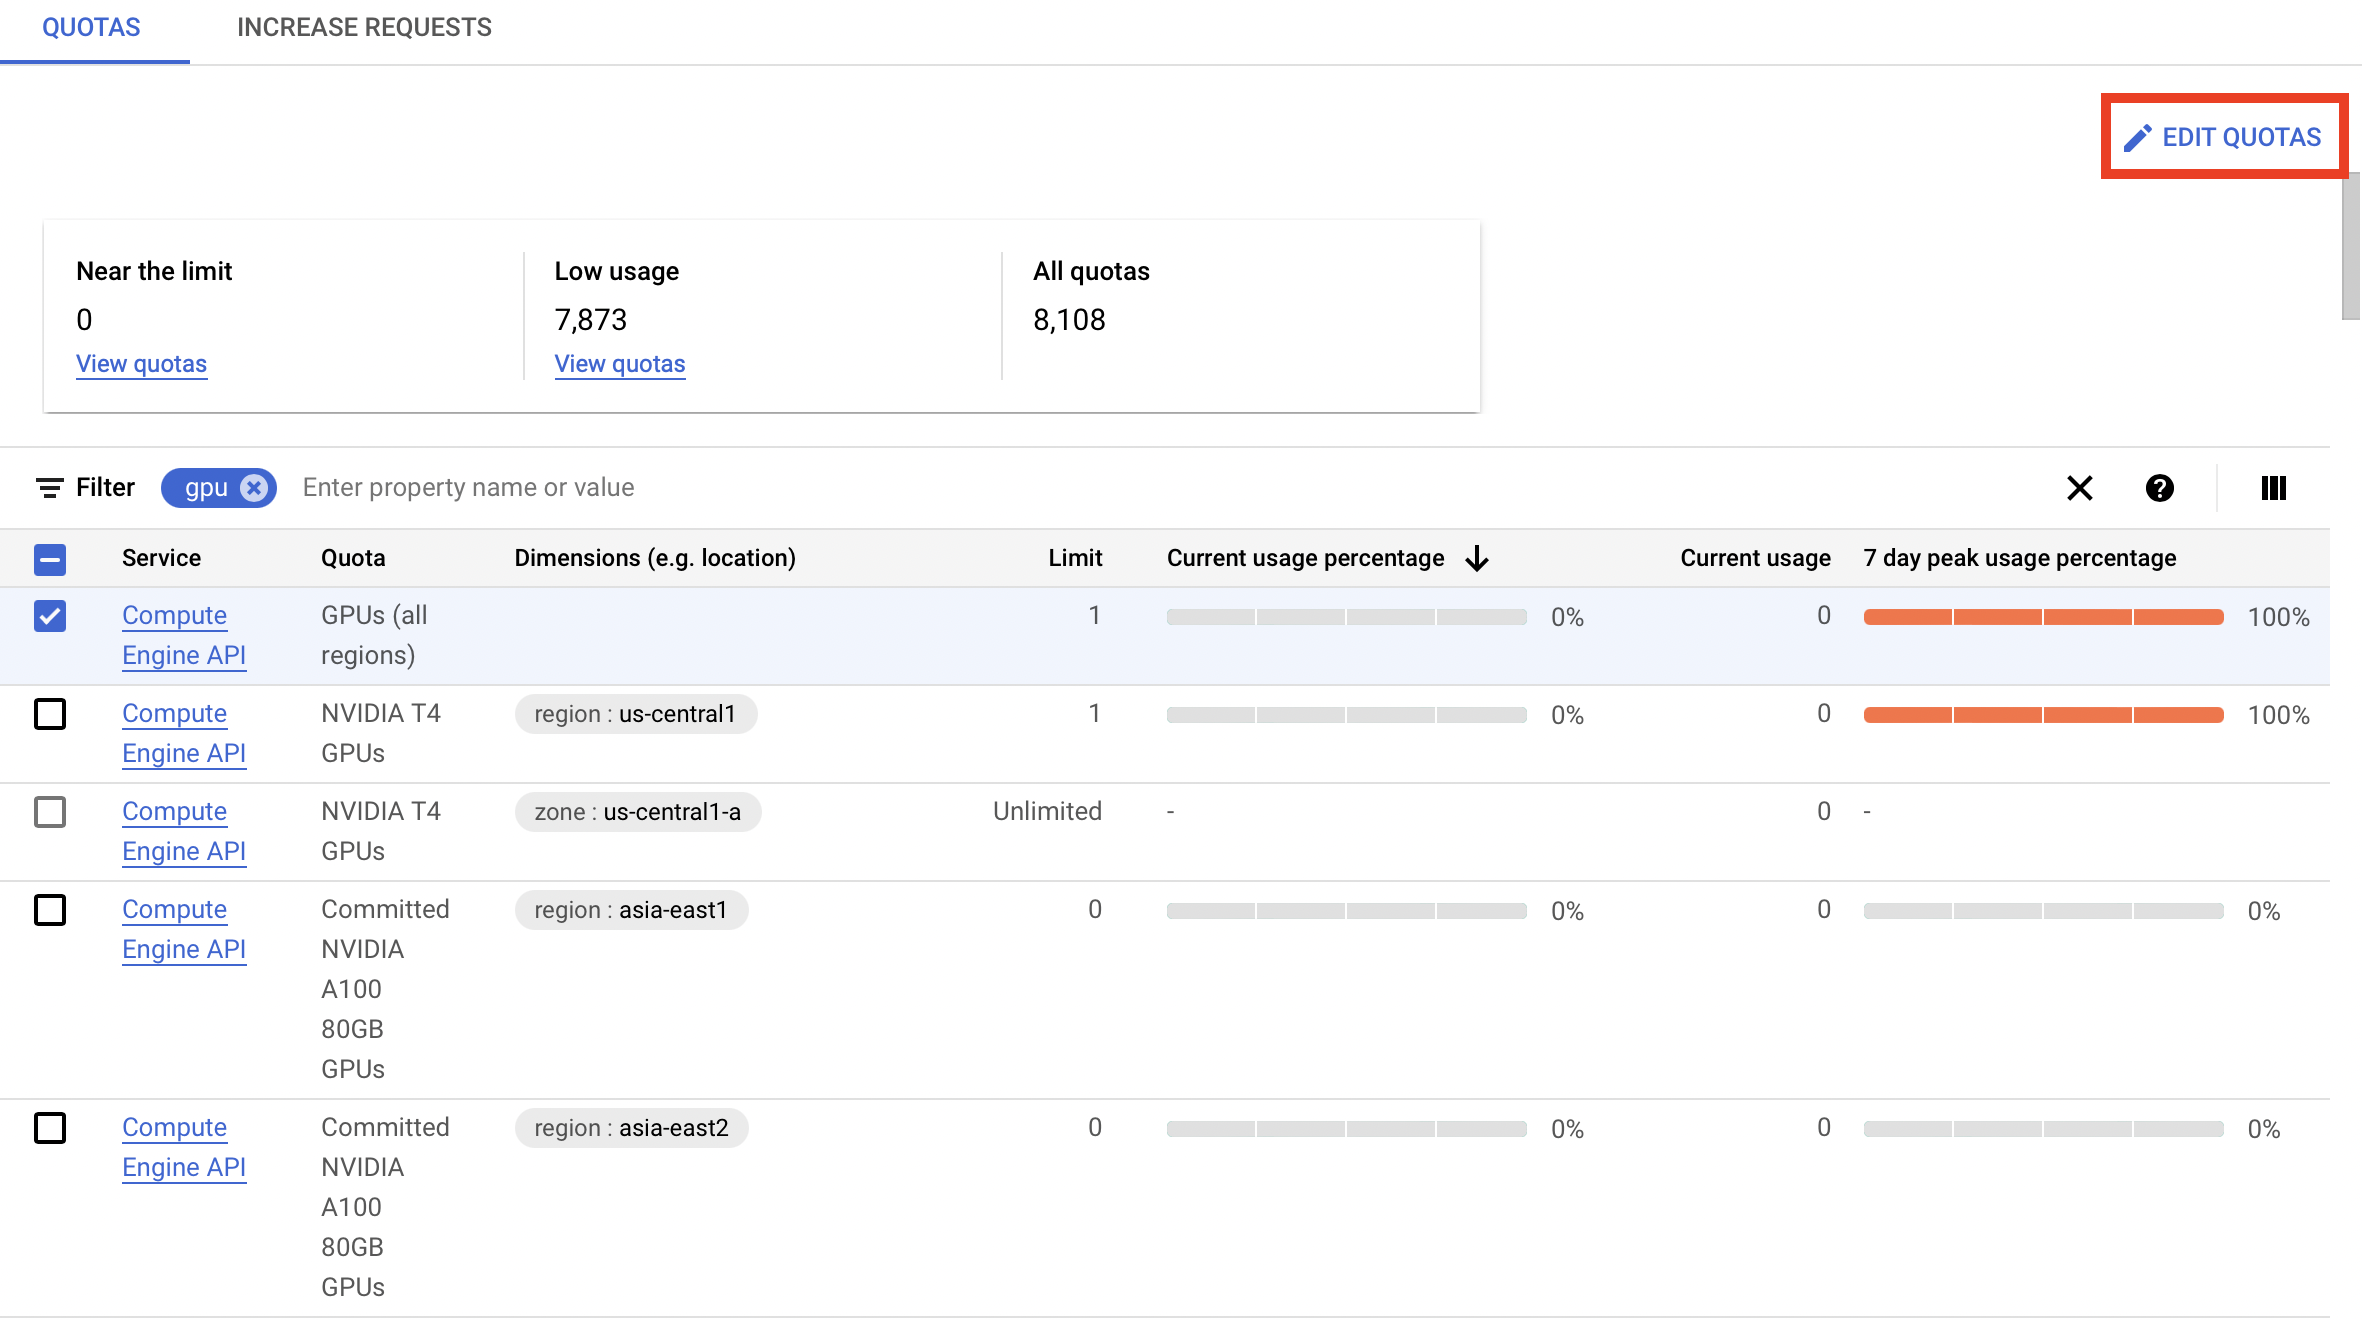
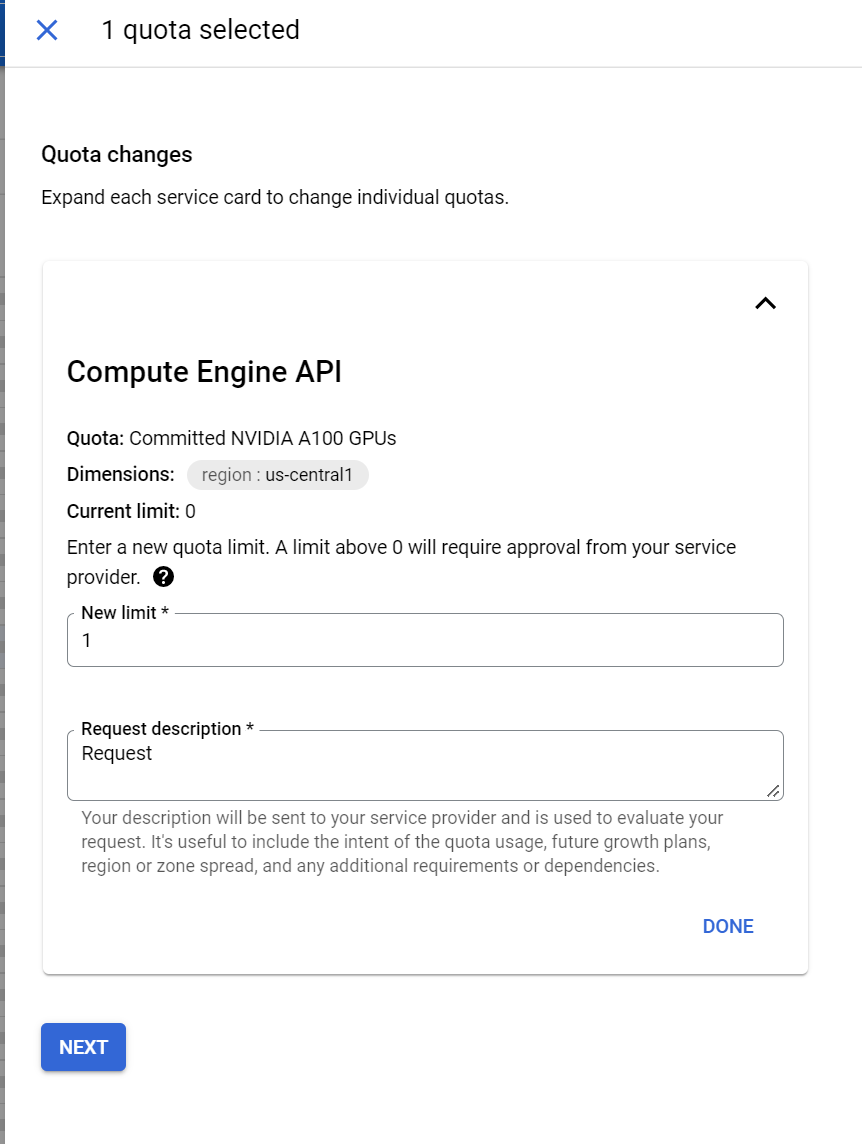
- If the limit is set to 0, select the quota and click "Edit Quotas".
- Set New Limit to 1 and enter any appropriate description for the request.
(Requesting more than 1 might require you to go through additional procedures with Google cloud sales team). -
Wait for a moment to let Google process your request.
You should receive an e-mail from Google informing you that they received the request. You will receive another e-mail after your quota request is approved. Note that the quota editing request would be processed typically in one or two business days. But the actual waiting period might vary from minutes to a few hours to 4 days or even longer, depending on the general quota demand. Typically, it takes longer for Google to process the requests at the end of the semester. Please be aware of that fact and manage your time for project experiments at the end of semester properly.
-
Create a new GCE virtual machine (VM) instance.
There are 2 options for creating a VM instance:
(a) To create a VM instance based on the custom image provided by the ECBM E4040 instructors, which includes all tools that you need (CUDA, Python, Jupyter Notebook, Tensorflow etc.) proceed to the steps below - this option is highly recommended;
(b) If you are interested in exploring GCP on your own, and would like to configure your own VM instance from scratch, study the detailed instructions available in GCP instructions.
Creating a VM instance in your GCP project, based on a pre-created custom image
- Go to ‘Compute Engine’ -> ‘VM instances’, click CREATE INSTANCE.
- Define your instance’s name and set region to ‘us-east1’ and zone to ‘us-east1-d’.
(Change the zone if requested resources are not available. This problem may occur frequently - you may need to spend time to understand which zones are better at which time. Focus on zones which are on the eastern side of USA). - Configure your instance settings: you can choose the number and type of CPUs and GPUs and memory size.
But keep the cost on your mind!
Note: check GPU availability in various zones on this site, you may need to experiment with different zones.
- Here are the suggested settings (which should be good enough for all E4040 assignments):
- set Region: us-east1, Zone: us-east1-d
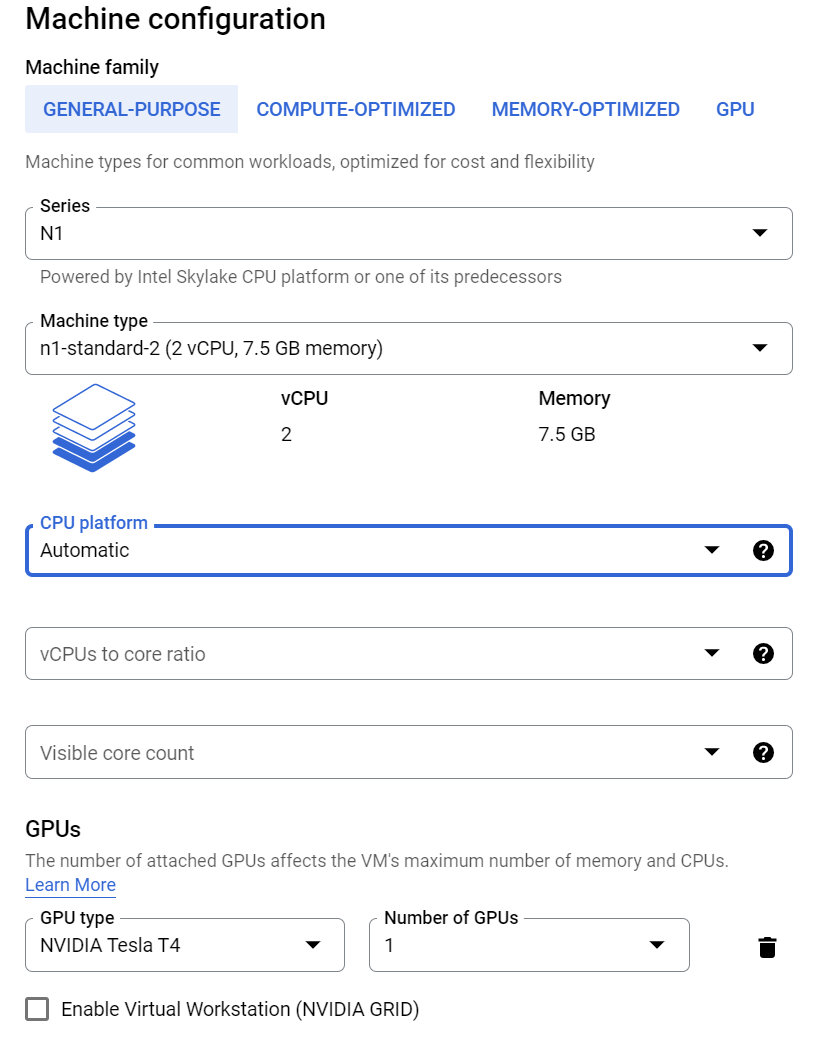
- In "GENERAL-PURPOSE", set Series: N1, CPU: 2, Memory: 7.5GB
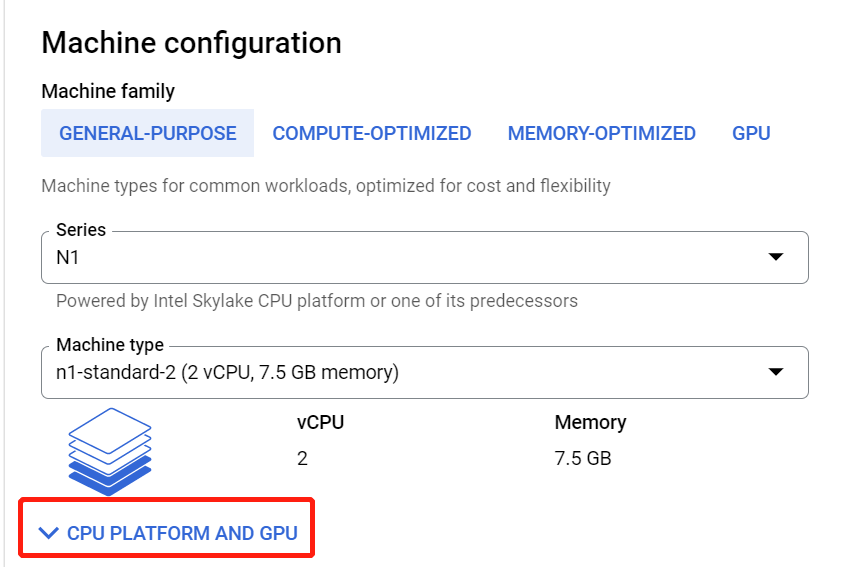
- Click "CPU PLATFORM AND GPU", use one T4 GPU
-
In the Boot disk section, click 'change'.
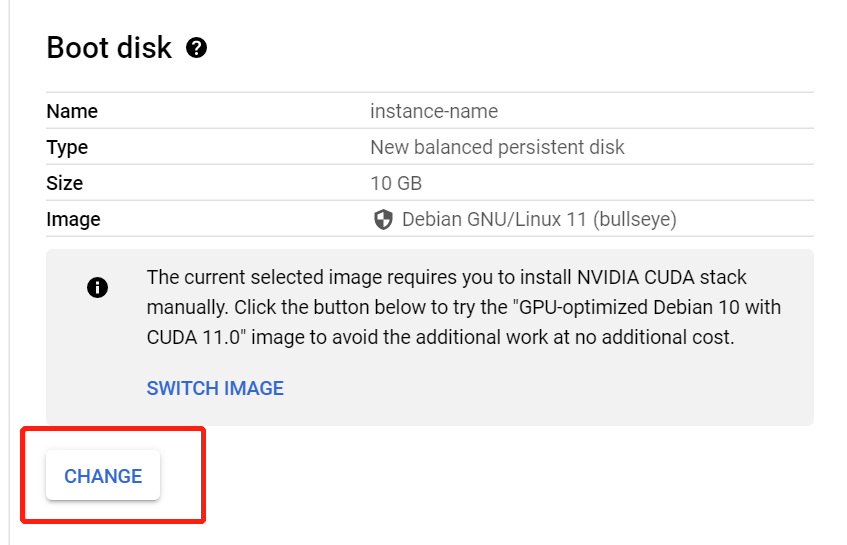 Select from custom images ‘ecbm4040-imageforstudents-tf24’
which is under the project ‘ecbm4040-ta’.
Select from custom images ‘ecbm4040-imageforstudents-tf24’
which is under the project ‘ecbm4040-ta’.This image is pre-installed with the following specs:
- User - ecbm4040
- Python environment name - envTF24
- CUDA: 11.0
- cudnn: 8.0
- Python 3.6.9
- tensorflow 2.4
- OS: Ubuntu 18.04.4
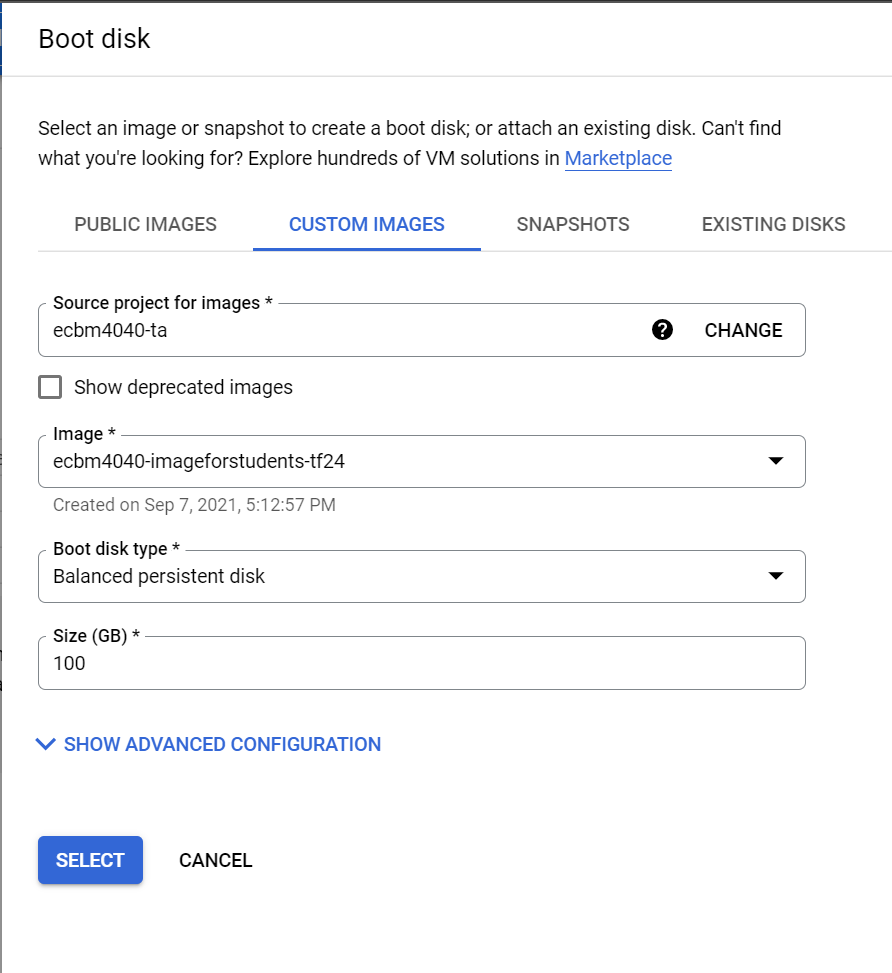
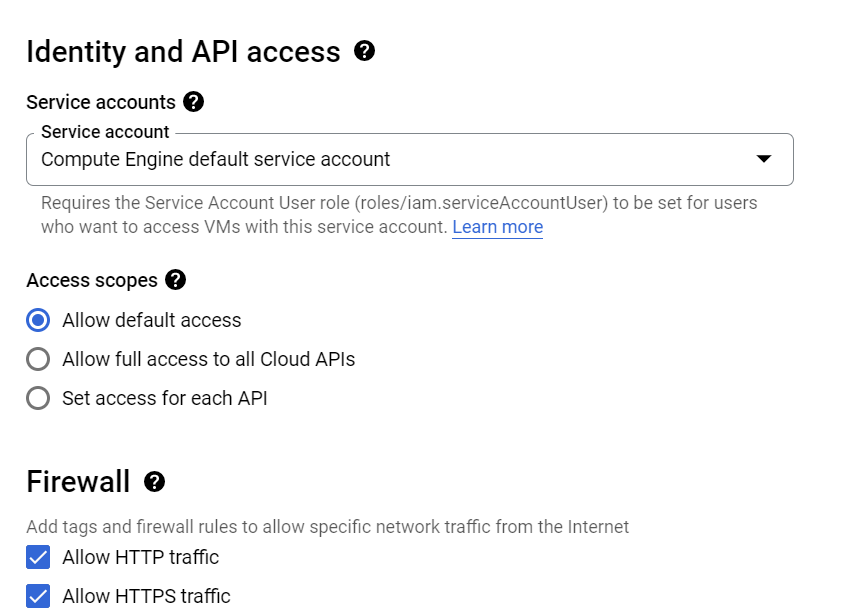
- Under 'Firewall', check ‘Allow HTTP traffic’ and ‘Allow HTTPS traffic’.
Note: you can later create additional different instances with various computational power for your project, the procedure is the same.
- Wait for several minutes, and the newly created VM instance will be running after the creation.
Step 3: Connect to your GCP instance
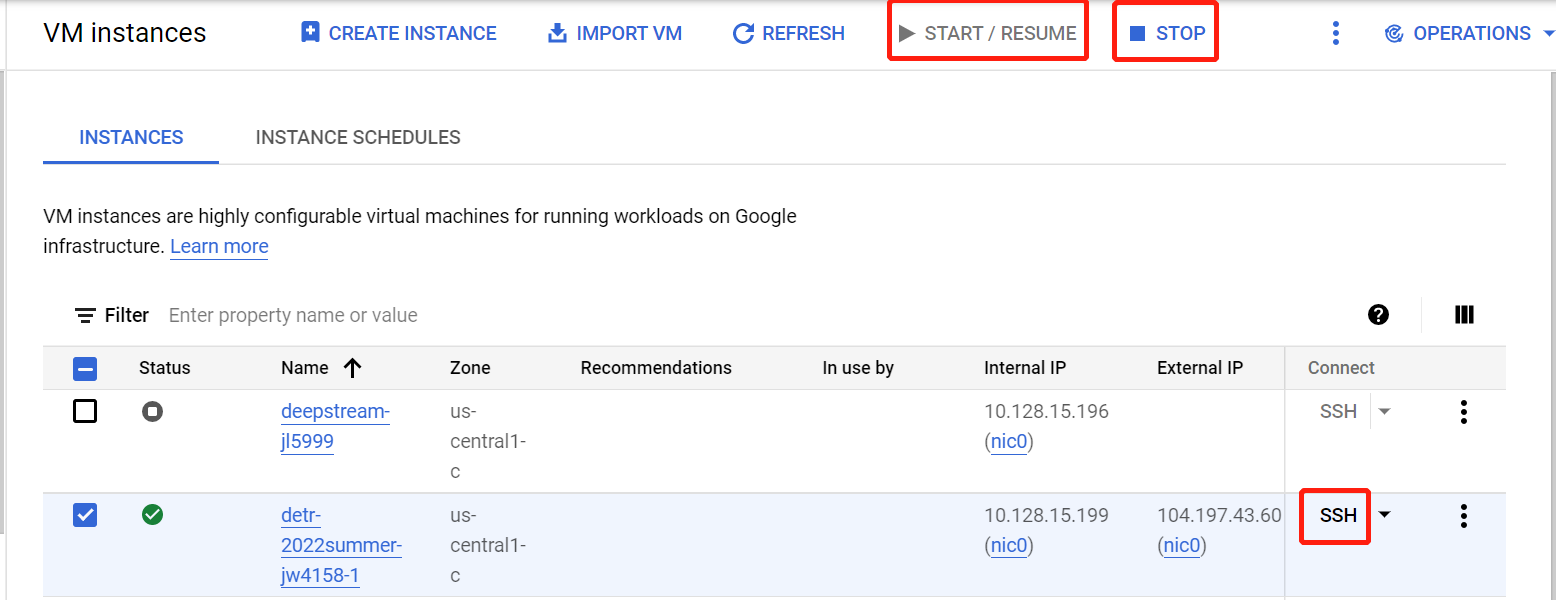
Before showing how to start an instance, we want to emphasize that you should always STOP the instance when you are not using it. You always get charged per hour while the instance is running, so remember to stop the instance every time after you finish your work. You do not have to delete the instance, it is enough to stop it.There are two methods to establish a connection to your cloud GCP instance from your personal computer: one is using the Google Cloud SDK, and the other is based on GCP firewall settings.
-
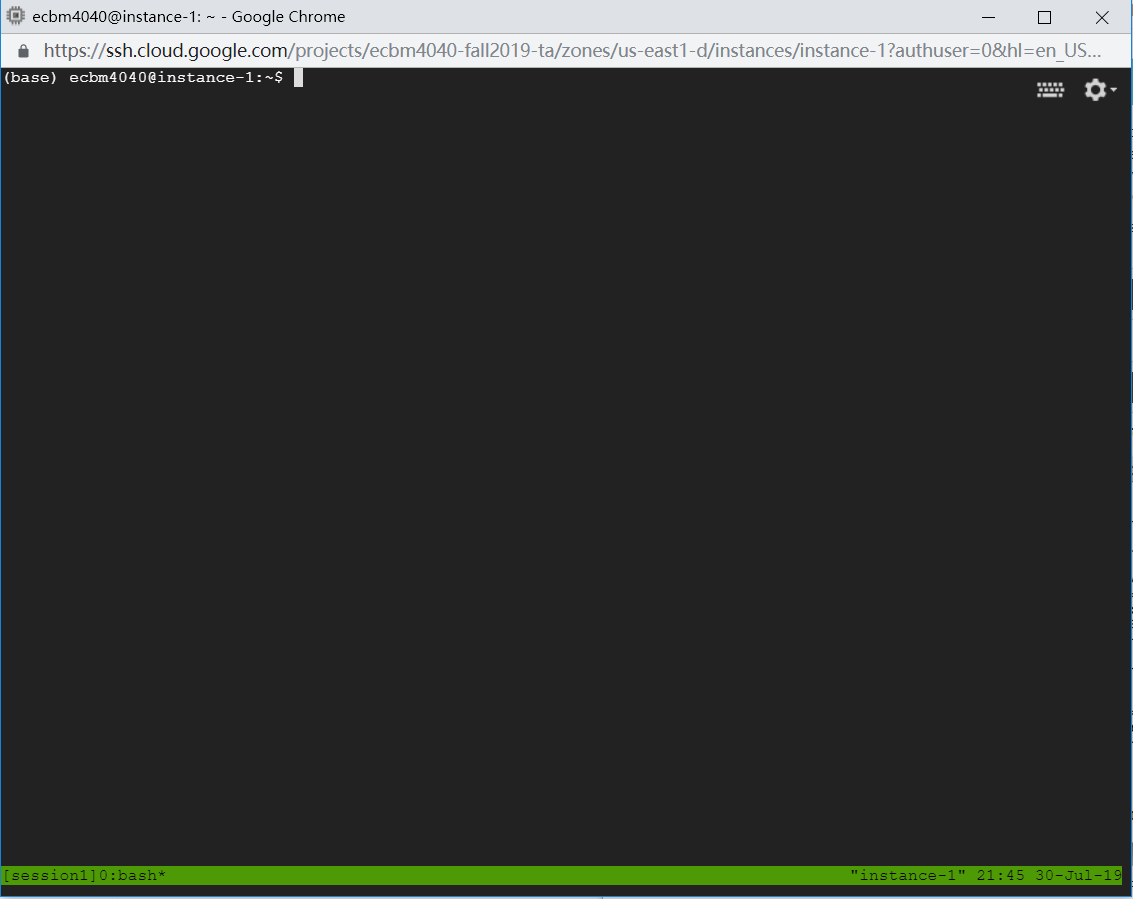
Method 1 - Connect to the instance directly from the GCP dashboard (online): Go to the list of compute instances on the GCP dashboard. Click the 'SSH' button next to your running instance and wait for several minutes.
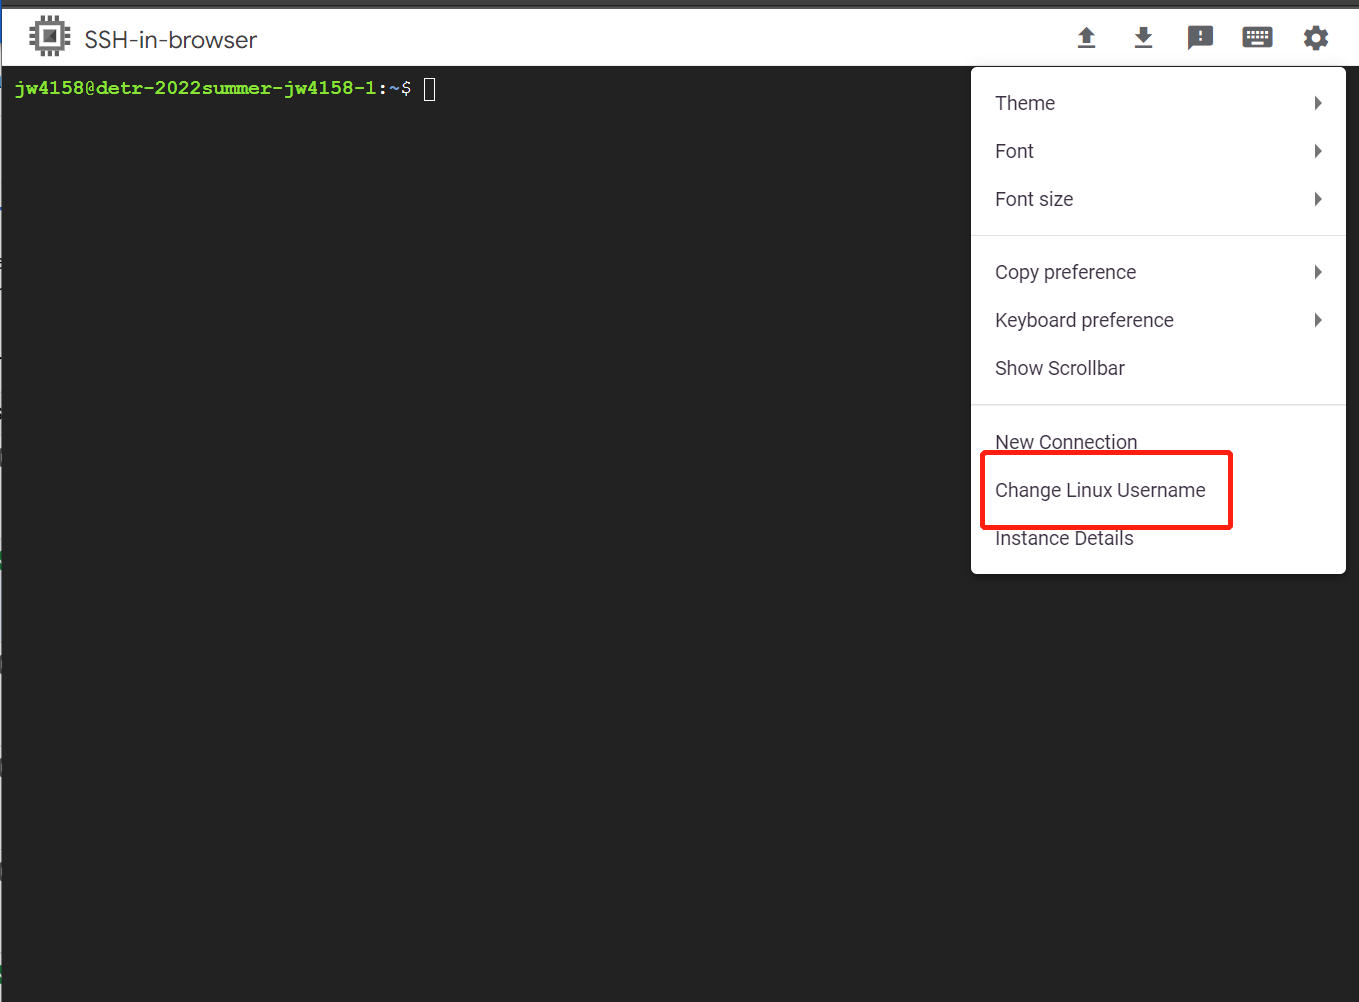
After the connection is established, a new cmd window will appear, you have to change your Linux user name to 'ecbm4040'. That can be done by clicking on the settings button in the command window, as shown in the screenshot below.
-
Method 2 - Connect to the instance using the Google Cloud SDK: Install the Google Cloud SDK onto your laptop first. After the installation, the instructions for interacting with your VM instance on the cloud can be called via SDK command lines from the local computer. Open the SDK console (cmd window) on your local computer, and initialize your Gcloud account using
gcloud initcommand. If this is the first activity after you installed the SDK, you will be directed to a website. The information such as zone or project id should conform with your previous online settings.After the initialization, type
gcloud initagain, and you should see something like the following: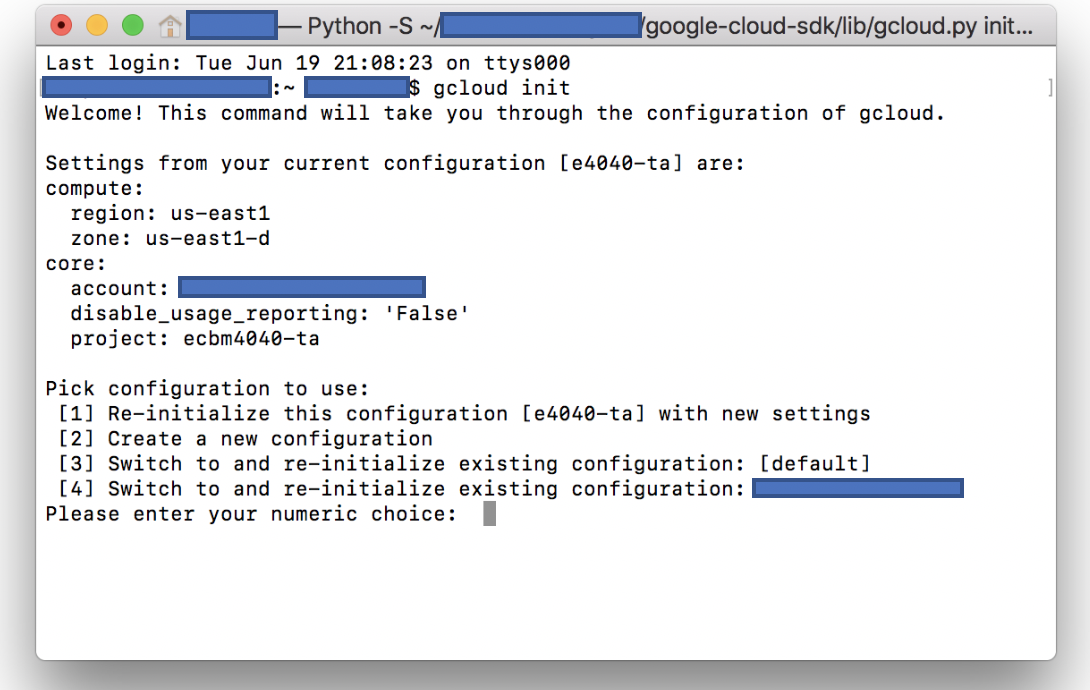
Now you can use ssh tools provided by Google Cloud SDK to connect to your instance (running in the cloud) with the following command:
gcloud compute ssh ecbm4040@your_instance_name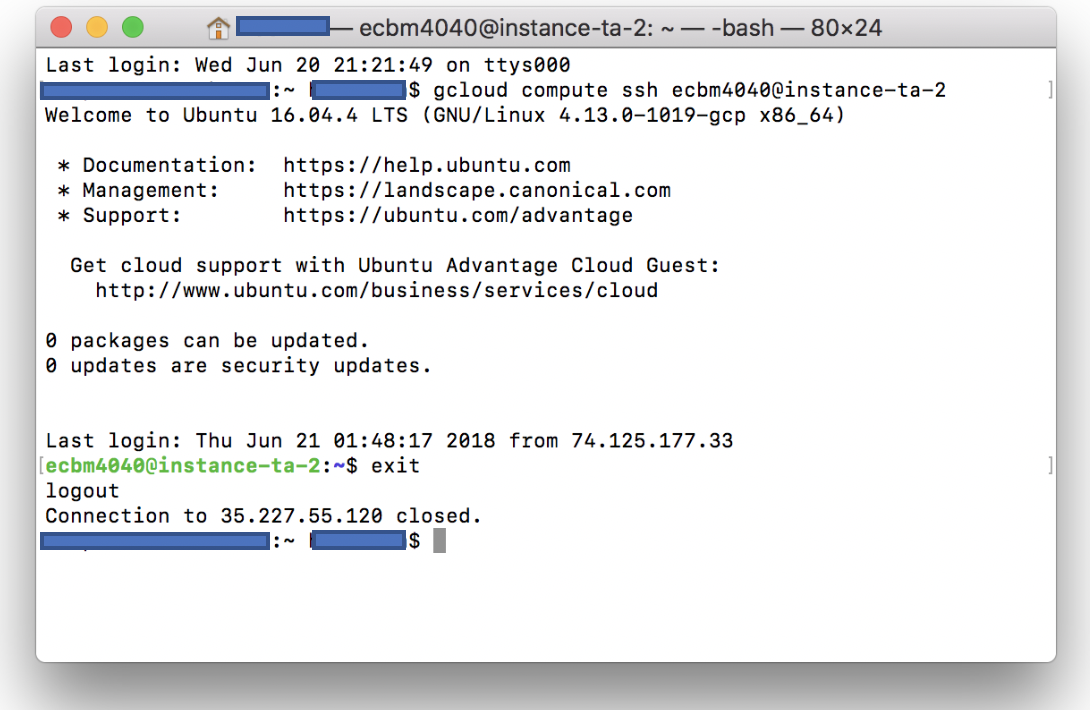
This will open up a remote connection in another cmd window, and provide a command line access to your google cloud instance.
When you want to close the connection, typeexit.Note: the custom image which instructors provide to you contains all the tools, installed under the username 'ecbm4040'. If you ssh into another user name, many components will not work.
Step 4: Check the Tools
This step will check whether the tools have been properly installed, and if they are available in your environment.
-
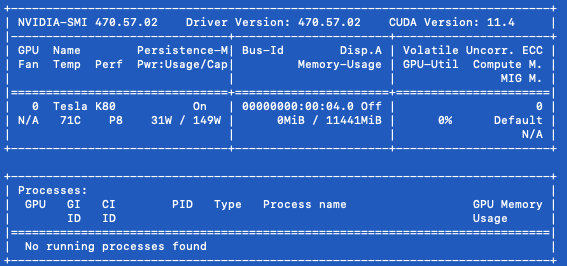
CUDA tool verification: First, check whether a GPU device is available:
ecbm4040@your-instance-name: $ nvidia-smiIf GPU is available, that output will show some basic information about your GPU device.
-
Python virtual environments are used for managing python and other software versions. (Note that for the local computer setup, we described the installation of Anaconda instead.) In the instructor's custom image, a conda environment called 'envTF24' has been set up. You need to use the instruction below to activate it. It is recommended that you use the same environment for your future assignments. If you need additional tools, they can be added by using pip install commands.
Switch user to ecbm4040 if you have not already done so and navigate to environment directory.
(base) username@your-instance-name: $ sudo su ecbm4040(base) ecbm4040@your-instance-name: $ cd ../ecbm4040Activate the envTF24 virtual environment
(base) ecbm4040@your-instance-name: $ source envTF24/bin/activateAfter the activation of the environment, you can review which packages are currently installed using the command pip list:
(envTF24) ecbm4040@your-instance-name: $ pip listNote: If you need to deactivate the environment, type
deactivate -
TensorFlow is an open-source library for deep learning created by Google. The version of TensorFlow in the cloud image which is provided by the instructors is 2.4. That is the version that should be used to complete the assignments for E4040 in Fall 2021.
To check the installation of TensorFlow 2.4, type
(Note: Do not confuse Python promptpython, and run the following code inside the python prompt.>>with the Linux command prompt$. If you want to exit python, type exit() to get back to the Linux prompt.)python>> import tensorflow as tf>> tf.__version__'2.4'To verify that the GPU is configured and CUDA libraries are successfully loaded:
tf.config.list_physical_devices()You should see
PhysicalDevice(name='/physical_device:GPU:0', device_type='GPU')printed to the console along with other messages indicating the opening of CUDA libraries.Step 5: Jupyter Notebook
We next describe (a) how to start a Jupyter server in your Google Cloud VM instance, and (b) how to open/access your Jupyter notebook
There are two ways to accomplish this: (i) Method 1 - Using the console of the Google SDK running on your laptop;
(ii) Method 2 - Configuring a firewall from the GCP dashboard.Jupyter tools have been installed in the 'envTF24' virtual environment in the GCP instance.
Configuring and starting Jypyter server on the GCP
-
Configure your Jupyter Notebook on the server side
First, generate a new configuration file:
(envTF24)ecbm4040@your-instance-name: $ jupyter notebook --generate-configOpen that configuration file:
(envTF24)ecbm4040@your-instance-name: $ vi ~/.jupyter/jupyter_notebook_config.pyAdd the following lines into the file. (If you are new to Linux and do not know how to use the vi editor, see this tutorial: https://www.cs.colostate.edu/helpdocs/vi.html).
c = get_config() c.NotebookApp.ip='*' c.NotebookApp.open_browser = False c.NotebookApp.port =9999 # or other port number -
Generate your Jupyter login password, press Enter for no password.
(envTF24)ecbm4040@your-instance-name: $ jupyter notebook password Enter password: Verify password: [NotebookPasswordApp] Wrote hashed password to /Users/you/.jupyter/jupyter_notebook_config.json -
Start Jupyter server in your Google Cloud VM instance
(envTF24)ecbm4040@your-instance-name: $ jupyter notebook
Opening the Jupyter Notebook:
Your Jupyter server is running remotely in your GCP instance. You need to connect your local computer to that remote server in order to view, edit and run your Jupyter notebook files from a browser on your laptop (Chrome, Firefox, etc.).
Method 1: Open Jupyter Noteboook using the Google cloud SDK
-
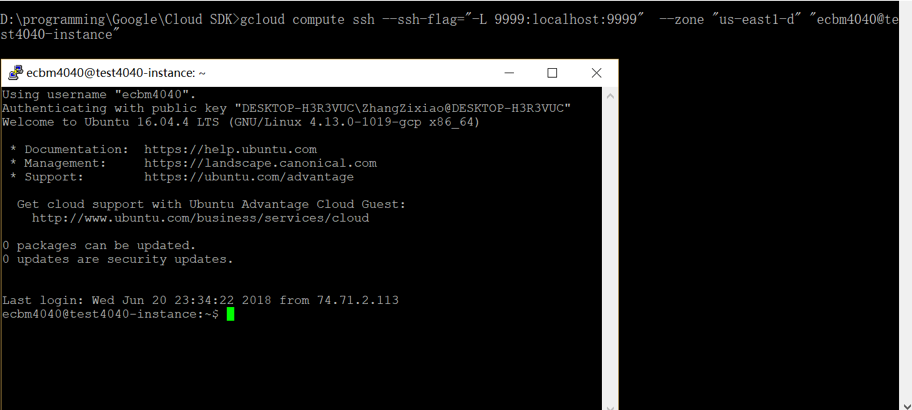
Open an SDK console and use SSH to connect to the Jupyter notebook. Type in the following code to set up a connection with your remote instance.
Note that in “-L 9999:localhost:9999”, the first “9999” is your local port and that you can set another port number if you want. The second “9999” is the remote port number and it should be the same as the port that the jupyter notebook server is using.gcloud compute ssh --ssh-flag="-L 9999:localhost:9999" --zone "us-east1-d" "ecbm4040@your-instance-name" -
Open a browser on your laptop (Chrome, IE etc.)
Go to
http://localhost:9999orhttps://localhost:9999and you will be directed to your remote Jupyter server. Type in the Jupyter password that you created before, and now you can enter your home directory in the linux virtual machine, which is running in the GCP.
Method 2: Open Jupyter Noteboook by configuring a firewall from the GCP dashboard
- This method does not require the Google cloud SDK
- Go to the GCP dashboard and navigate to the 'VPC network'->'Firewall'
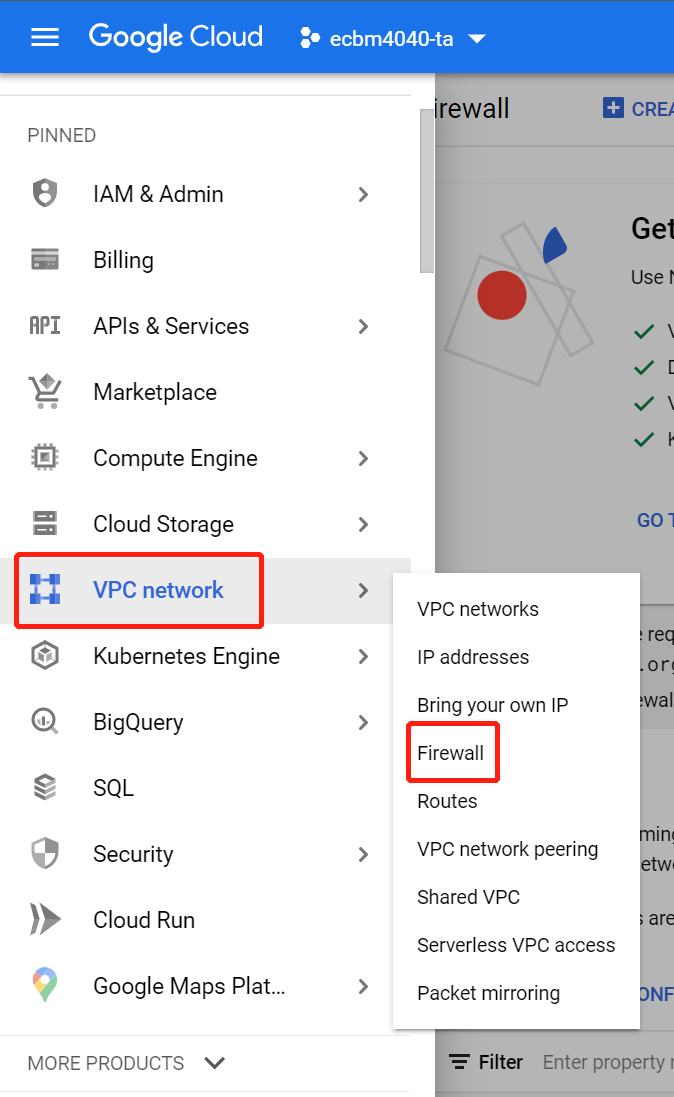
- Click 'CREATE FIREWALL RULE'

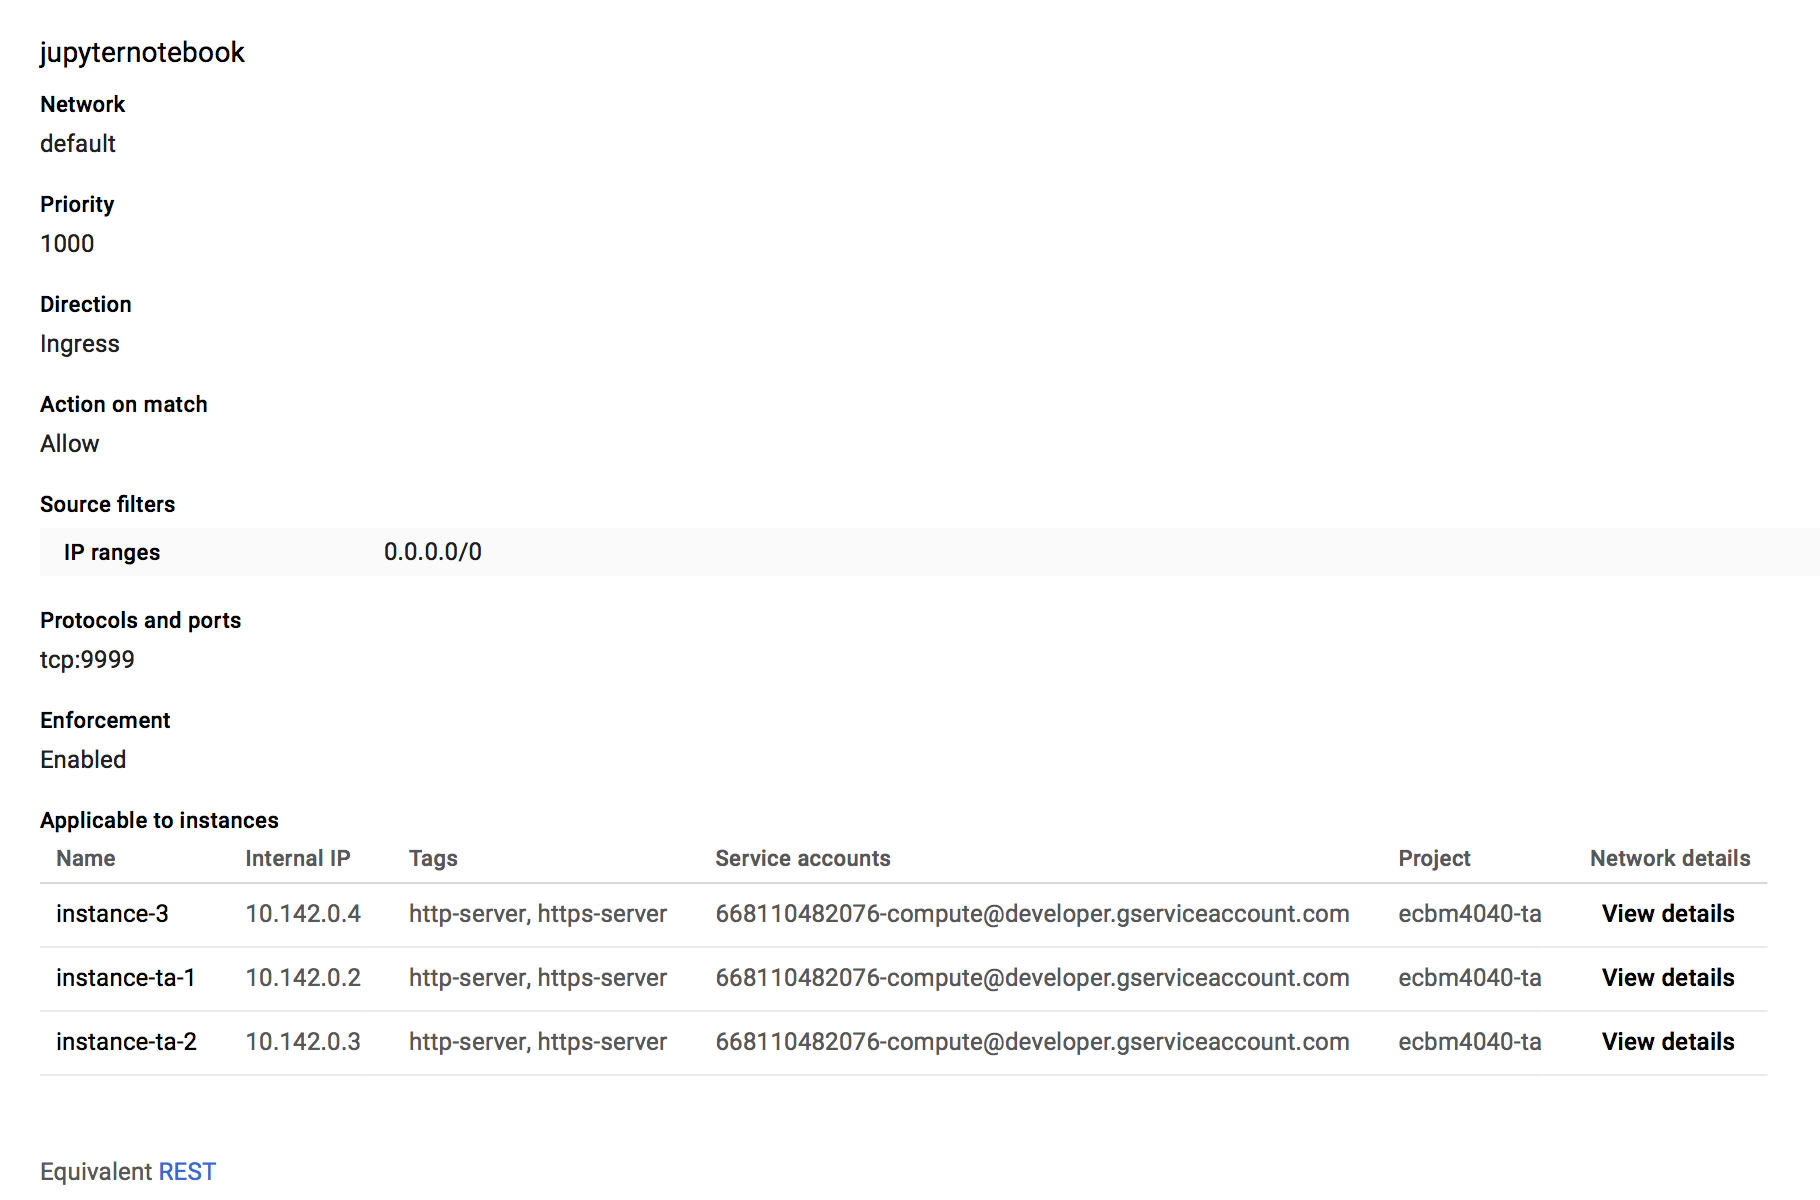
- Create a rule named 'jupyternotebook' as illustrated below
- Navigate back to your VM instances page on the GCP
- Your instance will have an External IP address - copy that IP address (yourExternalIP).

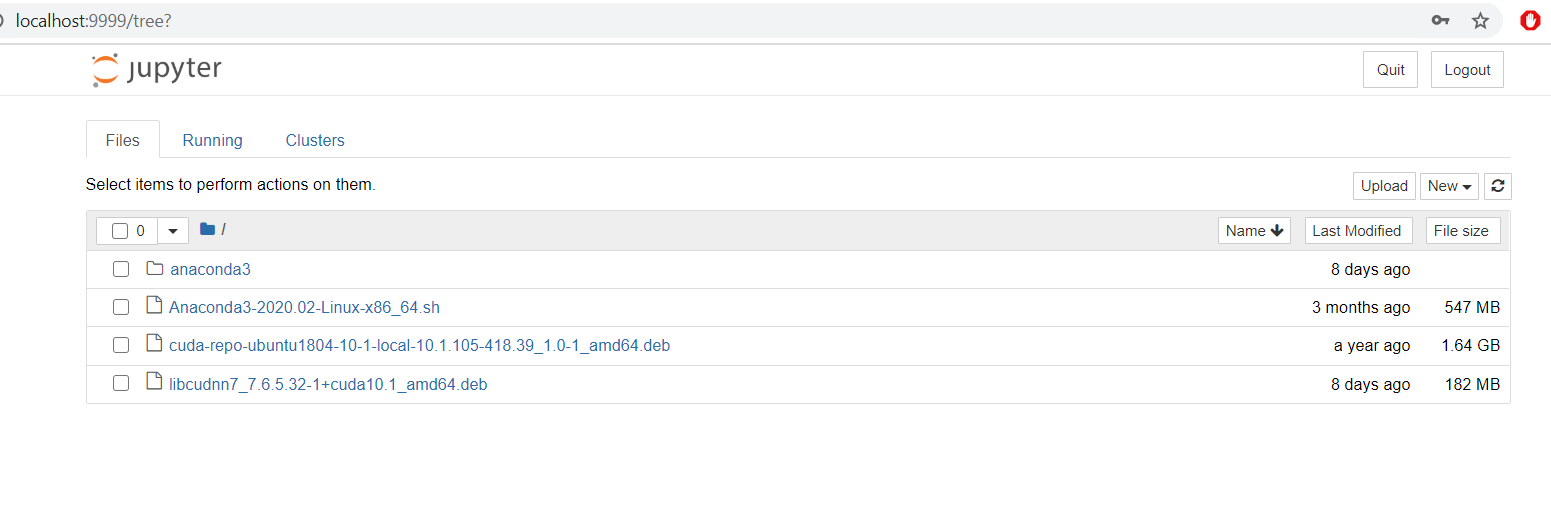
- Go to a new tab in a browser on your laptop. Type
http://yourExternalIP:9999. You should be directed to your Jupyter Notebook. You will see multiple directories, which you can navigate through. You can click one *.ipynb file to run a Jupyter notebook. - From this interface, you can also upload files from your local computer to you GCP instance.
You have finished the tool installation component of the Assignment 0.
*Step 6: Other useful tools in GCP
Tmux, a screen multiplexer. It allows you to run multiple programs in multiple window panes within one terminal. That capability makes Tmux a popular tool for working on a remote server (such as GCP) while connected from a personal computer. If you want to explore more applications of Tmux, click here, or read this note: http://deeplearning.lipingyang.org/2017/06/28/tmux-resources/
How to use Tmux for working with GCP:
- First, activate your virtual envioronment:
(base) ecbm4040@your-instance-name: $ conda activate envTF24 -
Next, create a Tmux session:
(envTF24) ecbm4040@your-instance-name: $ tmux new -s session1Then you will be in the session named 'session1'.
-
Now all the processes will be executing within the session. For example, you can open Jupyter notebook in the Tmux command window
just as we previosly introduced to you.
(envTF24) ecbm4040@your-instance-name: $ jupyter notebook
For more Tmux commands, refer to this link: https://www.hamvocke.com/blog/a-quick-and-easy-guide-to-tmux/.
The biggest advantage of Tmux is that it allows a process to keep running even when your laptop is disconnected from your instance in the cloud. If your network has accidentially broken, or you need to close your laptop, the process would still be running in the cloud session, unless you kill the whole session. We highly recommend that you train time-consuming deep learning models in a Tmux session.
- First, activate your virtual envioronment:
- runipy is used to run a *.ipynb file as a script. When you are running Jupyter on a remote server or on cloud resources,
there are situations when you would like the Jupyter to continue running without termination
when you shut down your laptop. Tmux is helpful, but you may also need
to run Jupyter in a command-line environment.
-
First, install runipy in your virtual enviroment (or continue within a Tmux session created from 'envTF24').
(envTF24) ecbm4040@your-instance-name: $ pip install runipy -
Suppose that you opened a Jupyter notebook, and used SSH to connect to it. Attach to your created Tmux session ('session1' here). Split the window panes. Switch to the new window pane, then you can use runipy to run your .ipynb file.
For more details, see http://deeplearning.lipingyang.org/2018/03/29/run-jupyter-notebook-from-terminal-with-tmux/.
-
First, install runipy in your virtual enviroment (or continue within a Tmux session created from 'envTF24').
ECBM E4040 Neural Networks and Deep Learning
Columbia University
-