Local (PC) Environment Setup for Deep Learning Experiments
UPDATE 8/30/2022 - The course does not support local (PC/laptop) environments any more. All assignments must be done in GCP/GCE, and the first assignment may be done in google COLAB.
UPDATE 9/13/2021 - This local environment setup is no longer supported. If you wish to setup a local computing environment for Fall 2021 and later, download the envTF24 requirements.txt and reference this tutorial.
In this tutorial, we will guide you through the steps of building an Anaconda-based working environment with TensorFlow and PyTorch on your local computer/machine. For E4040 course we will be using TensorFlow, but PyTorch is also a very popular framework that you might encounter in the future. Please follow these steps carefully in order to do your assignments. Note that the assignments will be based on particular versions of Tensorflow and Python, which may not be the latest versions (downloadable by default from public websites).
System requirements
- Sep. 2019: Windows 7 or later (64-bit), macOS 10.12.6(Sierra) or later (64 bit), and Ubuntu Linux 16.04 or later.
- Non-GPU equipped personal computers can be used. Initial E4040 assignments can be done without GPUs. Installation instructions for a special version of Tensorflow need to be followed (install CPU version of Tensorflow, skip steps "Install CUDA and GPU drivers" and "Install cuDNN"). For later assignments,Google Cloud resources with GPUs should be used.
- GPU-equipped personal computers with CUDA-capable GPU with compute capability higher than 3.0 (for local machines with GPUs of compute capability lower than 3.0, we advise to install the CPU version of Tensorflow, skip steps "Install CUDA and GPU drivers" and "Install cuDNN"). Check out CUDA GPU for your GPU card’s compatibility. Laptops are usually equipped with NVIDIA GeForce or Quadro graphics cards (GPUs).
- Mac products are not originally equipped with NVIDIA GPUs, so macOS users should install a CPU version of Tensorflow to debug code on your local machine (skip steps "Install CUDA and GPU drivers" and "Install cuDNN"). Google Cloud resources with GPUs should be used by Mac users to make full use of GPUs.
Contents
- Step 1: Anaconda Installation
- Step 2: Create Anaconda virtual environment
- (Optional) Step 3: Install CUDA and GPU drivers
- (Optional) Step 4: Install cuDNN
- Step 5: Install TensorFlow
- Step 6: Jupyter Notebook
- (Optional) Step 7: Install PyTorch
Installation Guide
The installation process is time-consuming and complex, so please use an external power supply for your computer. For reference, the official installation instructions for TensorFlow are provided here: https://www.tensorflow.org/install/. Note that versions of tools used in the official instructions may not be the same as versions of tools required for E4040 assignments, so you are advised to follow our installation steps carefully.
Step 1: Anaconda Installation
Anaconda is the most popular Python data science platform. It provides a Python package manager that lets you install, update and remove packages.
- Go to https://www.anaconda.com/distribution/. Choose the operating system of your computer and download the Anaconda version called "Python 3.7 version". This version is often referred to as "Anaconda 3" version. Although Python 3.8 is latest, for E4040 assignments in 2020 will use Python version 3.7.
- Install Anaconda to your local computer, following the instructions from the installer. If you have installed Python before, the Anaconda installer will prompt you whether you want to use the Anaconda Python as your system default Python interpreter (rather than "directly installed Python"). It is recommended that you use Anaconda Python as your system default Python.
- Notes: Anaconda 3 will most likely be installed into the directory called "C:\Users\userName\Anaconda3" on your computer. Anaconda 3 contains many packages - see the list here https://docs.anaconda.com/anaconda/packages/py3.7_win-64/; Anaconda 3 is large - more than 10GB, so if your computer does not have enough space, you may want to start with the Miniconda distrubution (a minimal version of Conda/Anaconda).
- Check if Anaconda is correctly installed:
- Windows method 1: Open a Windows Anaconda Prompt (command) window
by searching for it in the Windows system (you may use the magnifier search symbol
next to the windows symbol at the bottom left of the screen).
In the Anaconda Prompt window, type
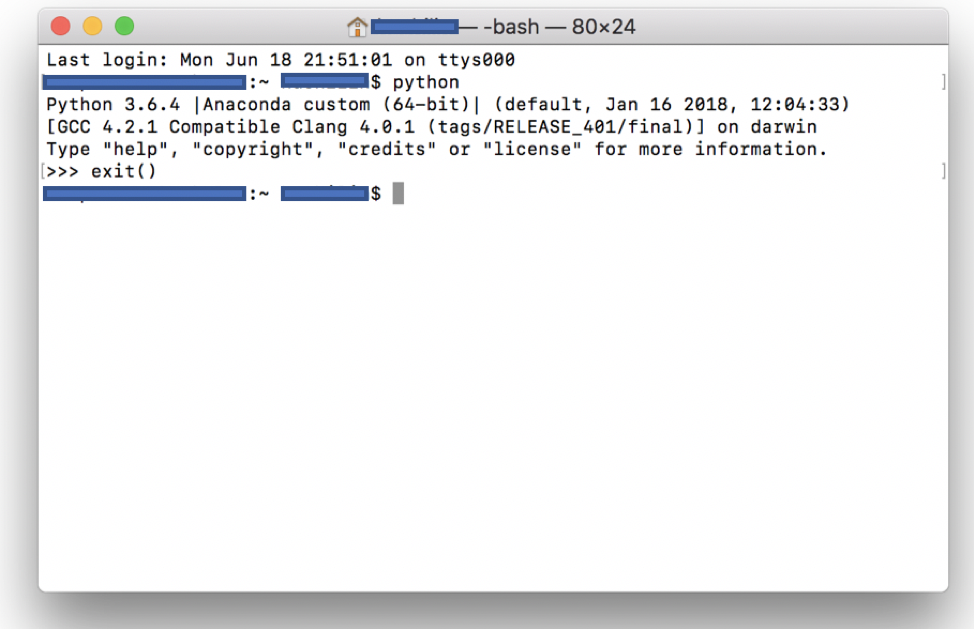
pythonand hit Enter. You should see the following text (or similar text mentioning Anaconda): "(base) C:\Users\zoran>python Python 3.7.3 (default, Apr 24 2019, 15:29:51) [MSC v.1915 64 bit (AMD64)] :: Anaconda, Inc. on win32". This would indicate that you are using the desired Anaconda-installation of Python. Typeexit()to quit Python. - Windows method 2: open a Windows command prompt window by pressing
win+R and typing
cmd. In the window, typepythonand hit Enter. If you see the following python interpreter, which indicates that it is the Anaconda interpreter, then it is finished. Typeexit()to quit Python. - Linux/macOS: open a console/terminal, and the rest is the same as in Windows.
- If
pythoninstruction doesn't work (in which case the system can not find this command), or the interpreter is not the Anaconda interpreter (in which case you have installed Python before Anaconda installation and Anaconda is not specified as your default Python), you may try one of the following: - You can use
conda listin the command window to see the list of all packages which you have installed. The most important packages for the begining are Python (3.7 version comes with Anaconda 3) and Jupyterlab (which contains Jupyter Notebook.
- Windows method 1: Open a Windows Anaconda Prompt (command) window
by searching for it in the Windows system (you may use the magnifier search symbol
next to the windows symbol at the bottom left of the screen).
In the Anaconda Prompt window, type
A useful link for information about Anaconda: https://docs.anaconda.com/anaconda/.
Step 2: Create Anaconda virtual environment
We are going to create a virtual environment on the Anaconda (conda) platform, and install necessary
modules/packages/tools into that virtual environment. A virtual environment is a named,
isolated, working copy of Python and other packages, which maintains its own files,
directories and paths so that you can work with specific versions of software libraries and Python versions without
affecting other projects.
Virtual environments make it easy to cleanly separate different projects and avoid problems with tool
dependencies and tool version requirements across software components.
conda command is the preferred interface for managing
installations and virtual environments with the Anaconda Python distribution
(getting started with conda).
-
A good approach to accessing the
condacommand is to first open an "Anaconda Prompt (Anaconda 3)", which looks similar to an ordinary command window. When Anaconda Prompt is opened at first, its prompt should be showing something like "(base) c:Users/userName". At this point, create a new directory where you will do experimentation with deep learning models; a good choice for the directory would be C:\Users\userName\Documents\AnacondaProjects. From the Anaconda Prompt window, navigate to C:\Users\userName\Documents\AnacondaProjects. In the Anaconda Prompt window, typeconda create -n envTF22 python=3.7(the name "envTF22" stands for environment based on TensorFlow 2.2. You can replace as per your wish). Typeconda env listto see the list of all environments that you created within your conda, one of them should be "envTF22". - After setting up the environment, type
activate envTF22to activate the virtual environment (for Linux/macOS users, typesource activate envTF22). Your command prompt will change to the name of your environment, and would appear as "(envTF22) :~ $". - Install some key tool packages into your environment "envTF22" for future use. For example, to install
multiple packages,
type
conda install pandas numpy scipy pillow matplotlib scikit-learnin the command window.Note: Many tool packages can be installed inside one environment. Two most common installation tools/methods are
condaandpip, and most packages can be installed with either of these tools (the choice between "conda" and "pip" may not be obvious). In this tutorial, we explicitly state what to use (conda or pip), but if you need some particular tools, you will have to examine what is the recommended method to load them. - Different projects may need different set of tools/packages. In case that your other project(s) may require different set of tools from those installed within the "envTF22" environment, you would create additional virtual environments with their own set of tools/packages (maybe different versions of Python or TensorFlow). One could create many different environments, but note that there is a memory cost to having too many of them.
- For instructions how to list all of your virtual environments, activate/deactivate and switch between them, see getting strated with conda or managing conda.
- Two instruction for listing all tools/packages installed within an environment are
conda list,andpip freeze. For instructions on how to manage conda environments, see manage-environments.
(Optional) Step 3: Install CUDA and GPU drivers
This step is optional. This step should not be done for computers without GPUs.
Compute Unified Device Architecture (CUDA) is a parallel computing platform and programming model created by NVIDIA. It harnesses the full power of graphics processing units (GPUs) for deep learning purposes.
- Check/install the GPU driver: If your driver is up to date, skip this step; if not, go to http://www.geforce.com/drivers, select, download and install the driver specific to your machine.
- Download CUDA 10.1. As of June 2020, the latest version of CUDA Toolkit is 11. For E4040, we will use mostly Tensforflow=2.2, and therefore we want to use CUDA version 10.1 for compatability.
- Install CUDA: install CUDA to your local machine. If possible, take note of and remember the CUDA install path because it’ll be helpful during cuDNN installation. This installation can last for tens of minutes.
- Detailed instructions for CUDA installation are shown in cuda-installation-guide-microsoft-windows. If you run into problems, you can refer to it.
- Some CUDA components require a prior installation of Microsoft Visual Studio.
- Detailed instructions for CUDA installation are shown in cuda-installation-guide-microsoft-windows. If you run into problems, you can refer to it.
(Optional) Step 4: Install cuDNN
This step is optional. This step should not be done for computers without GPUs.
cuDNN is a GPU-accelerated library for deep learning https://developer.nvidia.com/cudnn.
This step requires you to create an NVIDIA account.
If you are familiar with the PATH environment variable setup, you can follow the official instructions provided after you login into the NVIDIA account. Proper PATH setup would make it possible for your computer to automatically locate cuDNN *.dll files.
The alternative (manual) installation instructions are here:
- Go to https://developer.nvidia.com/rdp/cudnn-download to download cuDNN v7.6.5, for CUDA 10.1.
- Extract the content of the downloaded file, which should contain three directories, named ‘lib’,‘include’ and ‘bin’.
- Go to the CUDA install path (from the CUDA installation step) and look for three directories with the same names as above:
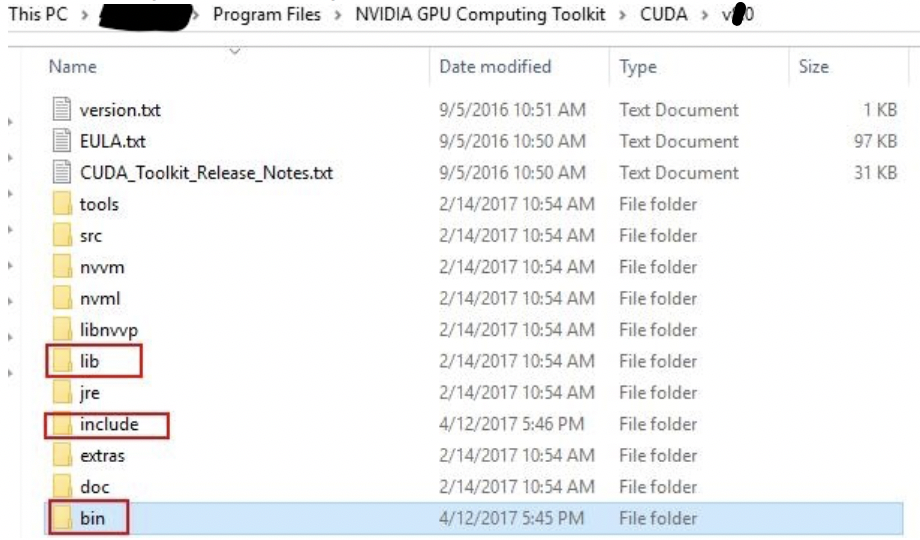
Copy the content of three cuDNN directories (*.dll files) into the corresponding CUDA path directories, i.e., copy the files from cuDNN ‘bin’ directory to CUDA ‘bin’ directory, and do the same for ‘include’ and ‘lib’ directories.
- You may also want to download and copy cudart64_101.dll in 'bin'.
- If the installation of cuDNN library components is not sucessfull, you will still be able to work with CUDA, but when you work with TensorFlow you will probably see a message: Couldn't open CUDA library cudnn.so.x. The computational speed will be compromised.
Step 5: Install TensorFlow
TensorFlow is an open source deep learning framework created and maintained by Google Brain Team https://www.tensorflow.org .
TensorFlow is a rapidly evolving deep learning framework, and new versions are released frequently. As of June 2020, TensorFlow 2.2 has been released, which incorporates new features. official guide. For running your assignments, you will also be asked to use a Google Cloud (gcp) instance, for which the instuctions are shown in another instruction manual; Google Cloud Image that we provided has tensorflow 2.2 (tensorflow-gpu 2.2 in case you have a gpu on your local machine) and thus the same version of TensorFlow should be used on your local mahine.
TensorFlow Installation
Note: Always activate your virtual environment (our suggestion is "envTF22").
TensorFlow 2.2 installation:
- Go to the Anacond Prompt (command) window, and make sure that your virtual environment is activated (our suggestion is "envTF22").
- If you want to use the CPU version of TensorFlow, in the command window, type:
pip install tensorflow==2.2 - If you want to enable a GPU for TensorFlow (for machines with GPUs), in the command window, type:
pip install tensorflow-gpu==2.2
Verify TensorFlow installation:
-
Start python by typing
python. For TensorFlow 2.2, type the following:>>>import tensorflow as tf >>>a = tf.constant('Hello TensorFlow!') >>>print(a) # If you see the following output, then you're all set! b'Hello TensorFlow!'
Step 6: Jupyter Notebook (and Jupyterlab)
Jupyter is a web-based Python programming environment, allowing you to edit code, display output results and plots, and show animations. You can even create a finely written report in Jupyter notebook, since it supports Latex grammar. For course assignments, we will require you to use Jupyter to do your work and demonstrate the results.
Jupyter Notebook installation (into conda/Anaconda environment):
-
Install JupyterLab: JupyterLab provides a web-based user interface which helps with organization of Jupyter projects, including Jupyter notebooks, text editors, terminals, etc.
Note: Make sure that you install it inside your virtual environment (suggested "envTF22"). Jupyterlab package comes distributed with Anaconda 3, but to make it available inside your virtual environment, you need to type
conda install -c conda-forge jupyterlabJupyter Notebook is installed by default with JupyterLab. One can then either directly start Jupyter Notebook (*.ipynb) files, or start JupyterLab to open Jupyter Notebook files indirectly ("*.ipynb" comes from the five letters of the older name of Jupyter notebook = ipython notebook).
-
Open Jupyter Notebook: In your virtual environment, type:
jupyter notebookorjupyterlab.Though JupyterLab can help in better managament of Jupyter projects, it is simpler to use jupyter notebook directly. We leave for you if you wish to explore JupyterLab features by yourself (see this website).
As the figure below shows, first
activateyour virtual environment if it is not already activated, then typejupyter notebookto start Jupyter notebook - it will open inside your browser.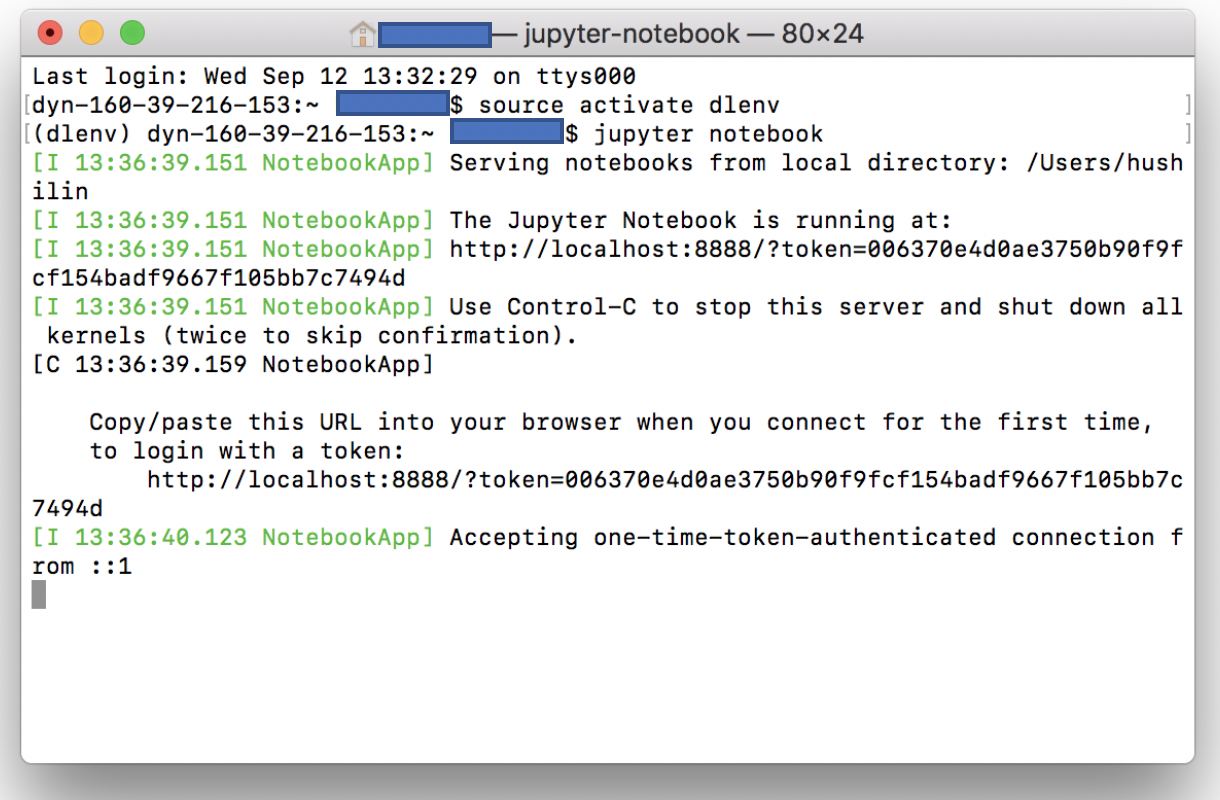 Now, You can view your Jupyter notebooks inside your browser (Chrome, IE, Safari etc.).
-
Optional: If you wish to experiment with jupyter notebooks, here are some tutorial links.
http://jakevdp.github.io/blog/2017/03/03/reproducible-data-analysis-in-jupyter/
http://ipywidgets.readthedocs.io/en/latest/examples/Lorenz%20Differential%20Equations.html
(Optional) Step 7: Install PyTorch
PyTorch is another open source machine learning framework for Python, based on Torch. It has been developed by Facebook's artificial-intelligence research group. Compared to TensorFlow, one of PyTorch advantages is the implicit dynamic network design.
PyTorch will not be used in E4040 course.
PyTorch installation: go to the official website http://pytorch.org/ and follow the install instructions, choosing the correct versions of Python and CUDA.

ECBM E4040 Neural Networks and Deep Learning
Columbia University